Open Water Diver
The manual for the IDU Supervised Diver and Open Water Diver courses. Every chapter ends with a knowledge check — the next chapter unlocks only when all answers are correct.

Introduction. IDU. Course Programme
1.1 The underwater world and the history of diving
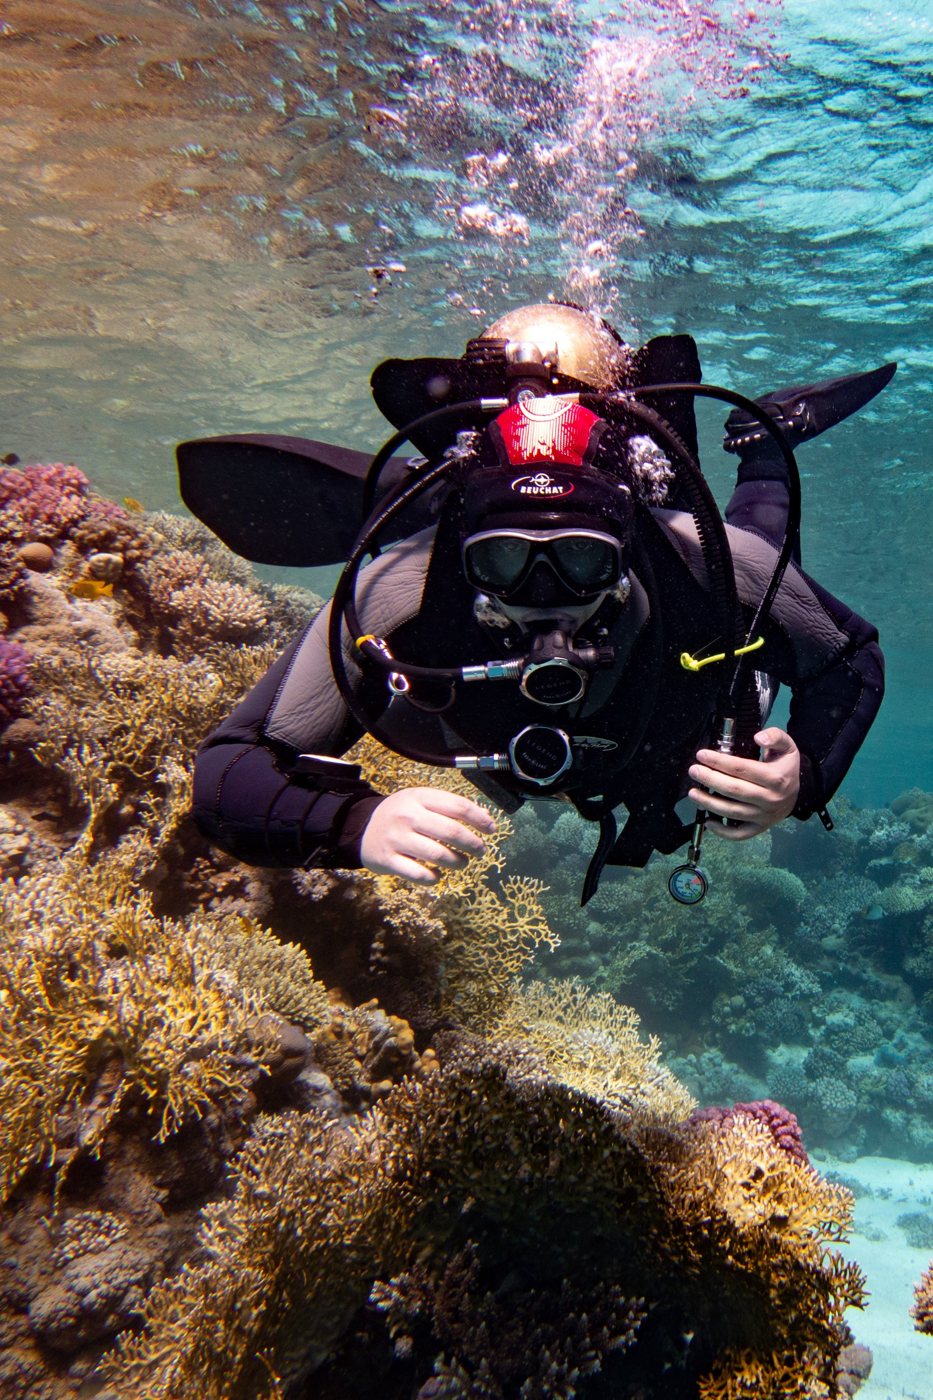
The underwater world is a hydrocosmos: weightlessness, extraordinary creatures and an ocean of new experiences. The ocean covers about 70% of the planet's surface, and people have long tried to explore it — first for food, then for shells and pearls, for military purposes, for salvaging cargo from wrecks and for servicing ships and harbour structures. This is how commercial diving developed, but until the mid-20th century all diving was purely utilitarian.
Everything changed in 1943, when Jacques-Yves Cousteau and engineer Émile Gagnan created the Aqua-Lung — a self-contained breathing apparatus with a demand regulator. Simple, affordable equipment and Cousteau's educational work gave birth to diving as a leisure activity. Today dozens of certification agencies and tens of thousands of instructors operate worldwide, and equipment rental, dive centres and liveaboard fleets have made diving accessible to everyone.
1.2 The IDU association
International Divers Union (IDU) was founded in 2018. IDU training programmes and standards are based on many years of experience and on international ISO standards; their main principle is safety.
The association's aims: to unite recreational and professional divers who regard safety as the most important principle of diving; to promote diving; to develop and implement training standards; to take part in underwater archaeology, biology and ecosystem-protection research; to search for historically significant wrecks and new dive sites.
IDU principles:
- Quality training is the foundation of safe diving.
- Safety comes with experience.
- Experience comes from regular practice.
- Knowledge and understanding provide the greatest dive safety.
1.3 Certification levels and limits
| Certification | Age | Max depth | How they dive |
|---|---|---|---|
| Supervised Diver IDU | from 10 (Junior under 14) | 12 m | only under the supervision of an IDU professional |
| Open Water Diver IDU | 18+; from 10 with written parental consent | 18 m | independently with a buddy or in a group, no-decompression dives |
| Junior Open Water Diver IDU | 10–14 | 12 m | as above; at 14 the certification automatically becomes OWD |
Dives are made in conditions equal to or better than those in which training took place. If conditions differ significantly (cold water, currents, poor visibility), a briefing from an IDU instructor is mandatory; best practice is an orientation dive with a professional. Dives are made only with adequate surface support: first aid kit, oxygen, a support vessel where needed, and a Divemaster-level professional or higher.
1.4 Course programme
Theory. Without knowledge it is impossible to understand what happens to the diver and the equipment underwater. You will study physics, physiology, equipment, the environment, dive planning and first aid.
Skill development has four stages: on land (the correct sequence of actions) → on the surface → in confined water → in open water. Well-practised skills make dives comfortable, automatic skills save lives in emergencies, and without regular practice skills are lost.
Confined water — a swimming pool of suitable depth or a body of water offering similar conditions of visibility, depth, water movement and access. Here you master your equipment and all basic skills without unnecessary stress (depth up to 5 m).
Open water — a body of water offering conditions typical of natural waters in the region. Open-water training dives are conducted to a maximum of 18 m (Junior — 12 m) and give you the experience needed for independent diving.
1.5 Underwater communication
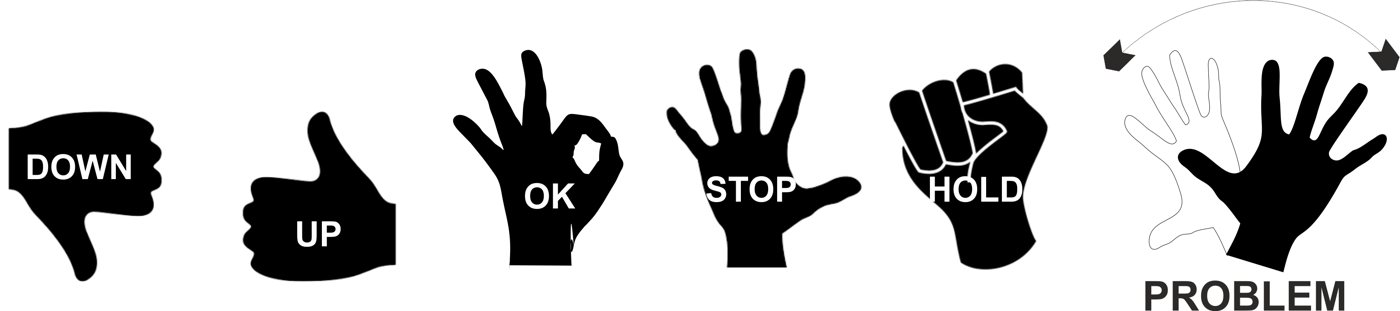

Divers communicate with hand signals. The safest system is one in which all or nearly all signals are given with one hand, leaving the other free. Basic signals: "down", "up", "OK", "stop", "hold/wait", "problem", "how much gas?" and pressure numbers. Your instructor will show you additional signals and regional variations.
1.6 Psychological preparation
The underwater environment does not forgive mistakes. IDU training is built on gradual adaptation — from simple to complex. Practising skills in calm conditions under an experienced instructor builds self-confidence and psychological resilience in stressful situations.
Knowledge check
8 questions
Diving Physics
Atmospheric, hydrostatic and absolute pressure; Boyle's, Dalton's and Archimedes' laws.
2.1 Atmospheric pressure
Atmospheric pressure is created by the weight of the air in the atmosphere. It was first measured by Evangelista Torricelli in 1643: a metre-long tube sealed at one end and filled with mercury was inverted into a dish of mercury — the column dropped to about 760 mm, leaving the "Torricellian vacuum" above it. Atmospheric pressure balances a liquid column of height
H = P / (ρ·g),
where P is atmospheric pressure, ρ is the density of the liquid and g is gravitational acceleration. For mercury this is 760 mm, for water about 10 m. So a 10 m column of water exerts pressure equal to atmospheric pressure: 1 atm ≈ 1 bar.
2.2 Hydrostatic pressure
The pressure a liquid exerts on an immersed body is called hydrostatic pressure. According to Pascal's law, pressure is transmitted equally in all directions. Its magnitude is P = ρ·g·h. For divers the rule is simple: every 10 m of seawater adds 1 bar — P = D / 10. A 10 m column of fresh water gives about 0.97 bar; we ignore this difference in our calculations.
2.3 Absolute pressure
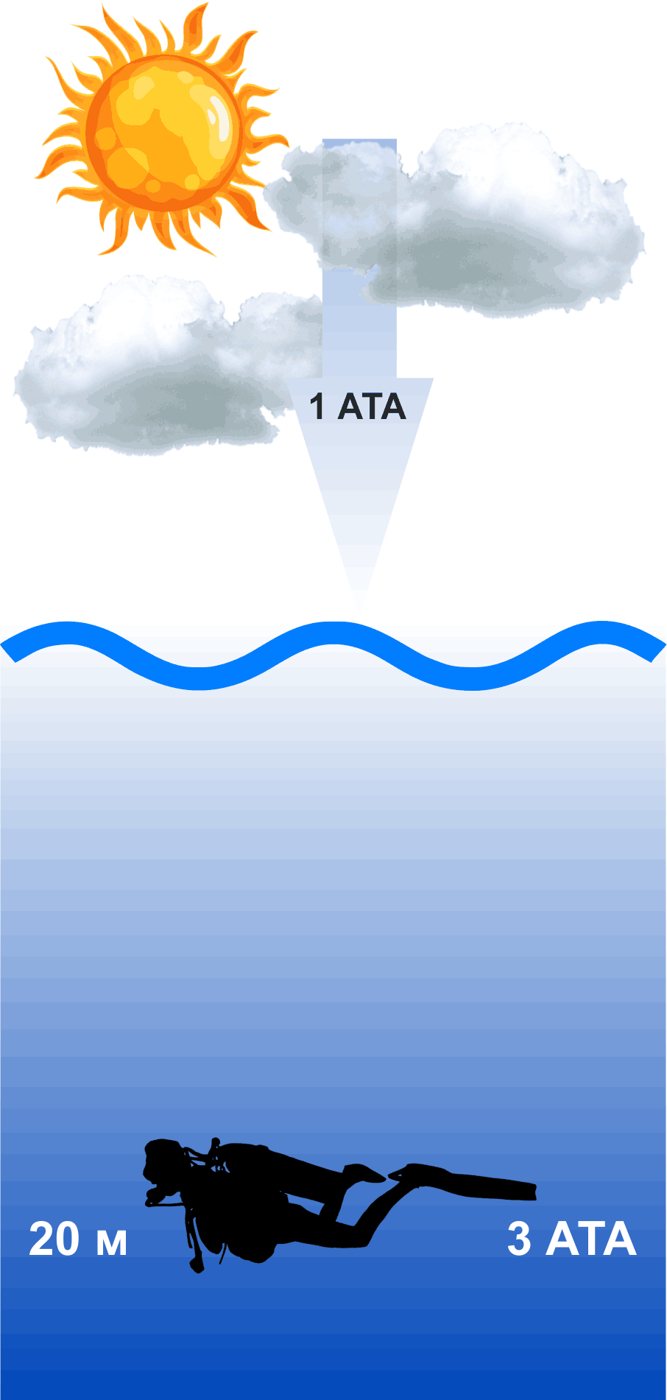
The diver is subjected to the sum of atmospheric and hydrostatic pressure — absolute pressure:
P abs = D / 10 + 1 (bar, ata).
At 18 m: 18/10 + 1 = 2.8 bar. A cylinder pressure gauge shows gauge pressure (above atmospheric), but all calculations of effects on the body use absolute pressure. Most diving injuries and illnesses are related to increased pressure and changes in pressure.
2.4 Boyle's law: pressure, volume, density
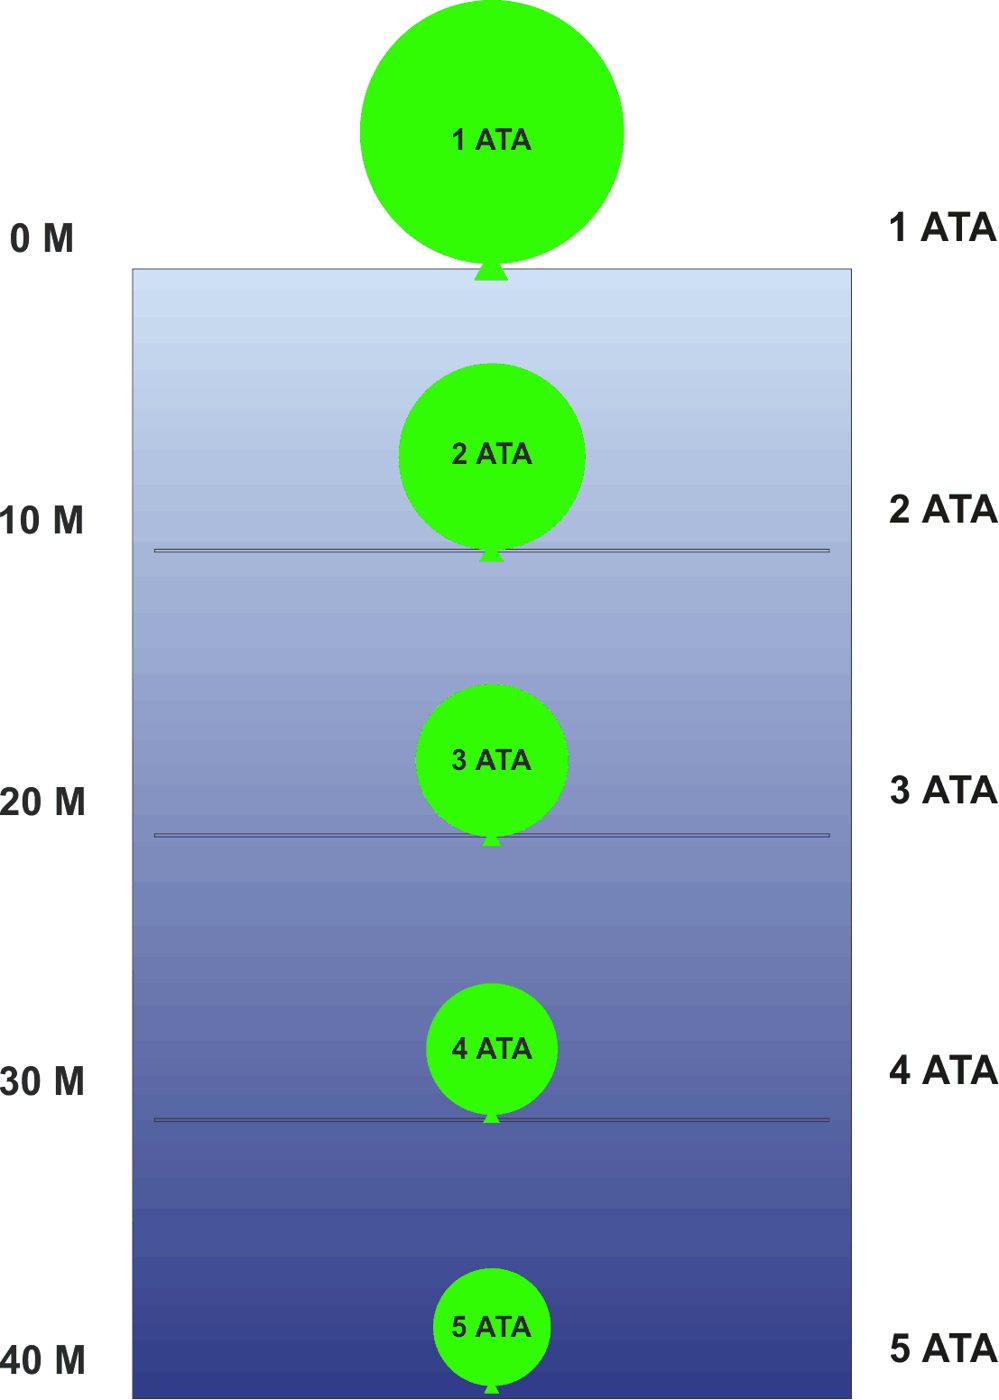
At constant temperature and mass of gas, P₁·V₁ = P₂·V₂: as pressure increases, gas volume decreases by the same factor. A 6 L balloon at the surface (1 bar) shrinks to 3 L at 10 m (2 bar) and to 2 L at 20 m (3 bar). On ascent the gas expands in the same way.
Important: the greatest relative volume change occurs near the surface — between 0 and 10 m the volume changes by a factor of two, while between 10 and 20 m only by 1.5. That is why buoyancy changes most and the risk of barotrauma is highest in shallow water.
A consequence of the law: gas density is directly proportional to pressure. At 20 m (3 bar) every breath contains three times as many molecules as at the surface — so gas is used up faster at depth and breathing takes more effort. The regulator delivers gas at ambient pressure: 1 bar at the surface, 3 bar at 20 m; lung volume stays the same.
2.5 Dalton's law: partial pressure
The total pressure of a gas mixture equals the sum of the partial pressures of its components, and each gas acts on the body as if it alone occupied the whole volume:
pp gas = P abs × fraction of gas in the mix.
Air is about 21% oxygen and 79% nitrogen. At the surface ppO₂ = 0.21 bar, ppN₂ = 0.79 bar. At 30 m (4 bar): ppO₂ = 0.84 bar, ppN₂ = 3.16 bar. Rising partial pressures explain nitrogen narcosis, tissue nitrogen loading and the increased toxicity of contaminants (e.g. CO) at depth — see the physiology chapters.
2.6 Buoyancy — Archimedes' principle
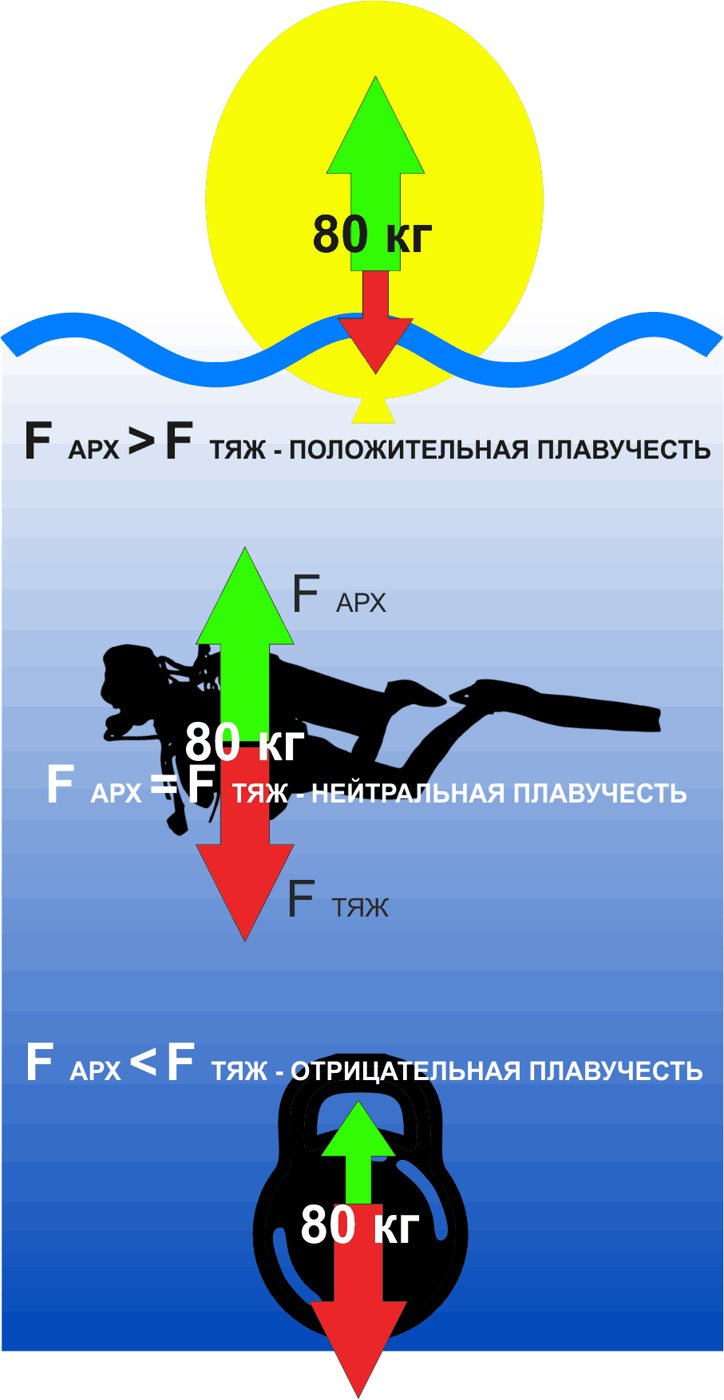
An immersed body is subject to an upward force equal to the weight of the liquid it displaces: F = ρ·g·V.
- Weight less than the buoyant force — positive buoyancy (the body floats).
- Weight greater — negative buoyancy (it sinks).
- Equal — neutral buoyancy: the diver neither sinks nor rises. We aim for it throughout the dive: it saves effort and gas and protects the bottom and its inhabitants.
The human body consists mostly of incompressible water, but wetsuit neoprene and gas in the BCD compress: on descent the volume decreases and buoyancy becomes negative — we add gas to the BCD. On ascent the gas expands and buoyancy increases — gas must be vented from the BCD, otherwise the ascent becomes uncontrolled. Fine buoyancy adjustment is done with breathing (lung volume).
Knowledge check
10 questions
Equipment I: Mask, Snorkel, Fins, Exposure Suits, BCD, Weights
Mask, snorkel, fins, exposure suits, hood, gloves, boots, buoyancy compensator and weights.
3.1 Mask
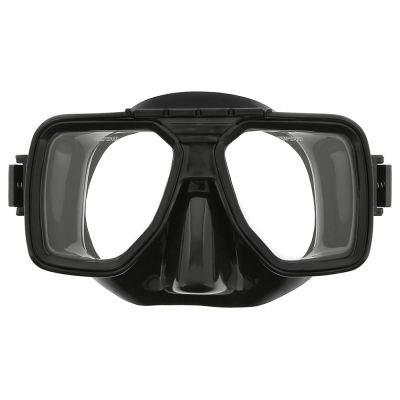
A mask has two jobs:
- It keeps an air space in front of the eyes. The eye can only focus when light reaches the cornea from air; without a mask everything underwater is blurred.
- It allows equalisation of the mask air space. That is why the mask has a nose pocket: by exhaling through the nose into the mask, the diver prevents mask squeeze (mask barotrauma). Swimming goggles are therefore unsuitable for diving.
Masks may have a frame or be frameless, one or two lenses, anti-reflective or corrective lenses; the skirt is made of black, coloured or clear silicone. Lenses must be tempered glass. Masks with a wide field of view are preferred.
How to fit a mask: move your hair away from your face (a moustache may prevent a seal and may have to be trimmed), place the mask on your face without the strap, press the frame lightly, hold your breath and do not exhale through your nose. If the mask stays on your face without your hands, even when you tilt your head down, there is no leak through the skirt and the mask fits. Silicone straps degrade from salt and sun and can snap during a dive; neoprene or webbing straps last longer.
3.2 Snorkel
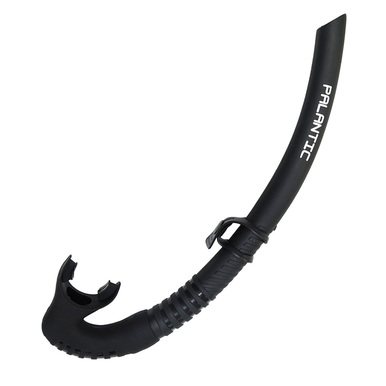
A snorkel saves gas while swimming on the surface — to the descent point and back. For a diver the best choice is a simple flexible snorkel without valves that folds into a BCD pocket. Do not snorkel near boats with running engines — exhaust gases are dangerous.
Rule: any equipment not in use during the dive must be securely stowed and must not hinder the diver.
3.3 Fins
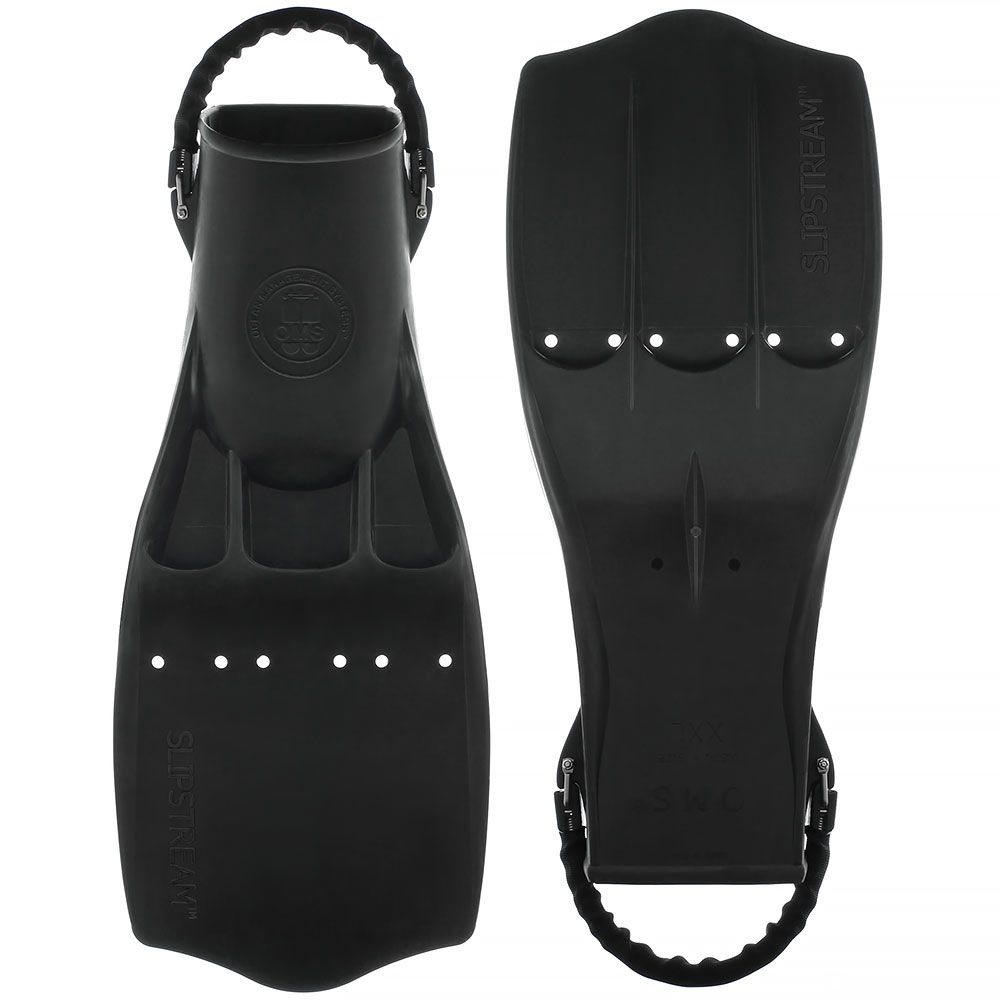
Fins provide propulsion and directional control. There are:
- snorkelling fins — full foot pocket, simple design;
- freediving and spearfishing fins — long flexible blades requiring special technique;
- diving fins — full-foot or open-heel (adjustable straps or spring straps). Open-heel fins are more versatile: they are worn over boots that protect the feet on shore from rocks, coral and sea urchins.
Composite fins (made of several materials) are light and convenient for recreational diving but perform less well in strong currents and cold water. Fins made of a single material (rubber, monoprene) are heavier but more powerful and durable; they are used by military, professional and technical divers. Choose fins for the conditions in which you will dive.
3.4 Exposure suits
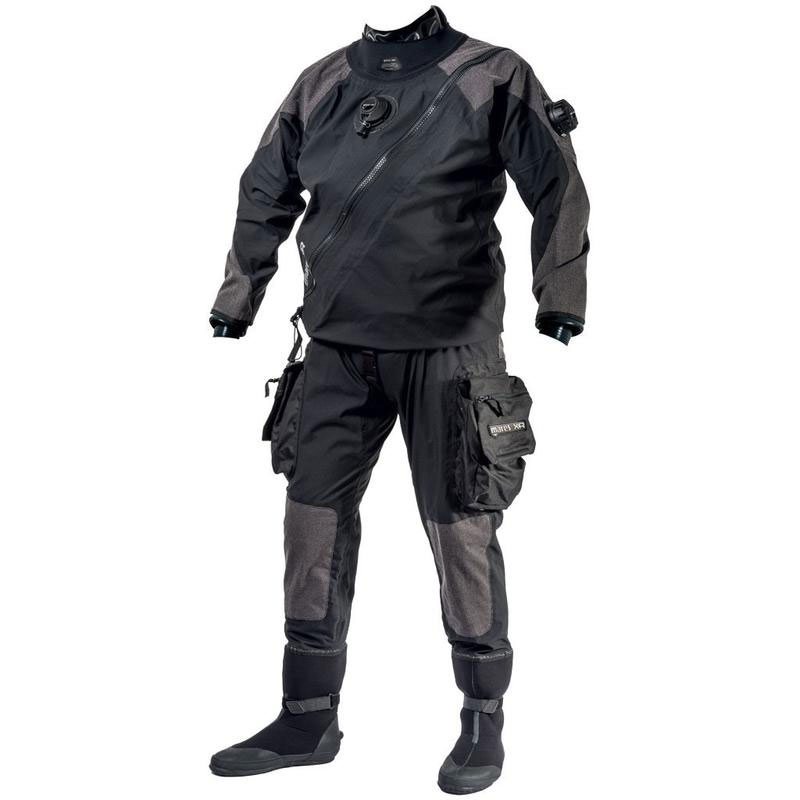
Wetsuits are made of neoprene — a foam material containing gas bubbles. There are full suits and shorties. Two-piece open-cell suits are designed for freediving and spearfishing: they are inconvenient for scuba and quickly compress and thin out at depth.
Thickness guide (individual sensitivity to cold varies):
| Water temperature | Protection |
|---|---|
| 28–30 °C | 3 mm |
| 25–27 °C | 5 mm |
| 20–24 °C | 7 mm (+ hood) |
| 16–20 °C | 7 mm semi-dry suit or drysuit |
| below 16 °C | drysuit |
A semi-dry suit is a wetsuit with improved seals at wrists, ankles and neck and a waterproof zip: almost no water circulates inside.
Wetsuit drawbacks: limited insulation and variable buoyancy — neoprene compresses at depth (the suit becomes thinner, warmer protection and buoyancy decrease) and expands on ascent. Advantages: price and availability. Cut varies a lot between manufacturers, so always try a suit on.
Drysuits are made of neoprene, crushed neoprene or multilayer fabrics (bilaminate and trilaminate). Seals are latex, silicone or neoprene, glued or on quick-change rings. The zip is watertight. Insulation is provided by the undersuit, chosen according to temperature. Neoprene drysuits are warmer and cheaper but heavier and more easily damaged; trilaminate suits are tough, light and versatile (from the tropics to the Arctic) but more expensive. A drysuit has inflator and exhaust valves: gas in the suit maintains insulation and prevents suit squeeze. Drysuit diving requires the Dry Suit Diver IDU course.
3.5 Hoods, gloves, boots
- A hood (3–9 mm) reduces heat loss through the head and neck — an area with an intense blood supply. It must fit snugly without restricting movement.
- Gloves protect against cold and injury. Wet gloves are neoprene; dry gloves have seals or attach to a drysuit and are worn with liners. Check local rules: some marine parks prohibit gloves.
- Boots with hard soles protect the feet on shore and keep them warm; top pads protect against chafing from the fin pocket.
3.6 Buoyancy control device (BCD)
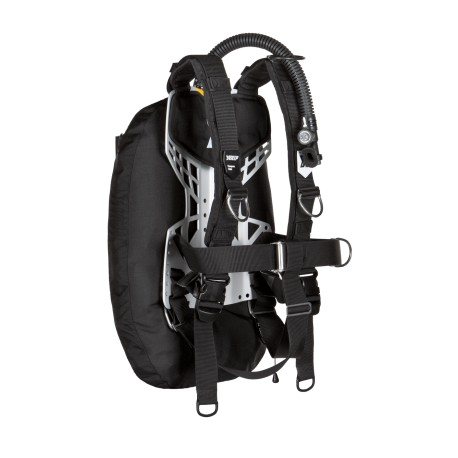
BCD functions:
- compensating for buoyancy changes at depth;
- providing positive buoyancy at the surface;
- securing the cylinder, weights and all equipment to the body;
- carrying accessories.
One-piece designs (jacket or wing with integrated harness) are convenient and have pockets, integrated weights and extra dump valves. Drawbacks: if one component fails the whole unit goes for repair; the size is fixed.
Modular designs (backplate, harness, wing) are a versatile "construction kit" with quick replacement and upgrade of components. IDU recommends modular systems as the most reliable and adaptable to different conditions.
3.7 Weight systems
Weights offset the positive buoyancy of the diver and equipment. Options:
- a weight belt with a quick-release buckle (released with one movement);
- integrated BCD weight pockets — releasable or not;
- weights on cylinder bands, on the backplate (trim pockets).
Dropping weights is an emergency procedure. With correct weighting and safe diving practice you will probably never need it, but every diver must know how to drop both their own and their buddy's weights.
Knowledge check
10 questions
Equipment II: Cylinders, Regulators, Instruments, Accessories
Cylinders and valves, regulator, instruments, dive computer, SMB, spool, lights, knife; assembly and care.
4.1 Cylinders
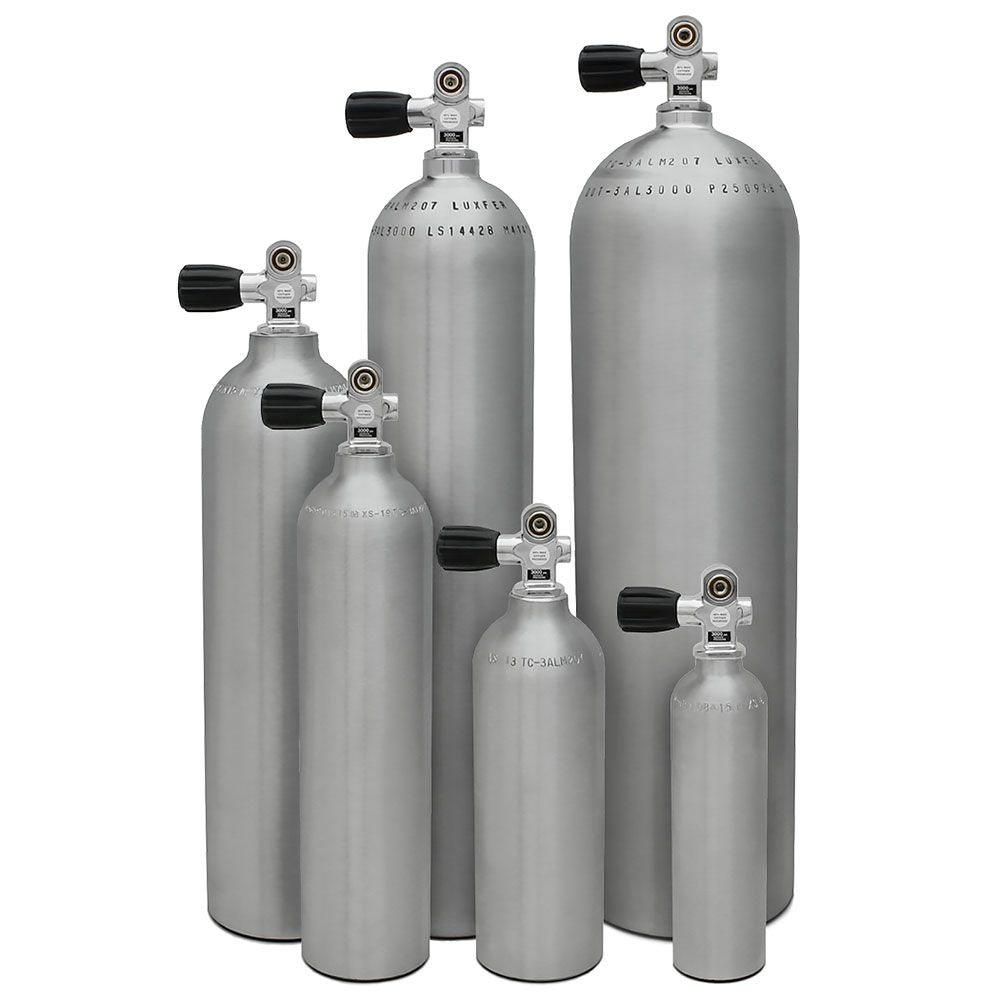
Cylinders are made of steel (hemispherical bottom, needs a boot) or aluminium (usually flat bottom). Steel cylinders are negatively buoyant, while aluminium cylinders become positively buoyant towards the end of the dive — take this into account when weighting.
Common sizes: steel 10, 12, 15 L; aluminium is marked in cubic feet of gas at working pressure: S80 (aluminium, 80 cu ft) has an internal volume of about 11.1 L.
Working pressure: aluminium usually 207 bar (3000 psi), steel 232 bar (≈3365 psi) or 300 bar (≈4350 psi). Filling a cylinder above its working pressure is prohibited: it risks cylinder failure, and an overfilled cylinder is condemned at inspection. Test pressure (higher than working pressure) is applied only during the hydrostatic test. Both are stamped near the neck.
Inspection follows the rules of the country of use: visual inspection (usually annual — inside and outside, for corrosion and damage) and hydrostatic test (usually every 5 years; the date is stamped on the cylinder). A visual inspection sticker is a sign of a conscientious dive centre.
4.2 Valves
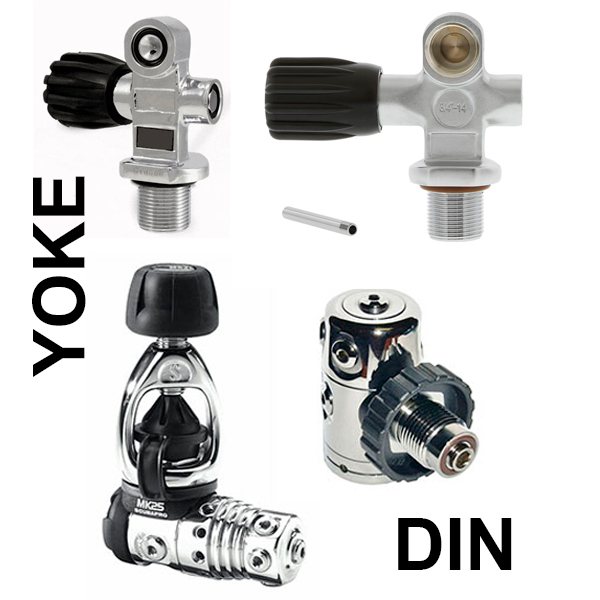
There are two connection standards:
- YOKE (INT) — the regulator is clamped on; the O-ring sits exposed on the valve face; working pressure up to 232 bar. Common in the Americas and Asia.
- DIN — the regulator screws into the valve, the O-ring is captured inside the connection; 5 threads — up to 232 bar, 7 threads — up to 300 bar. Common in Europe. More reliable and compact.
IDU recommends DIN valves and regulators. DIN-to-YOKE adapters and convertible valves are available.
Valves have one or two outlets: two outlets allow two independent regulators — important in cold water, where freezing is possible.
4.3 Regulator
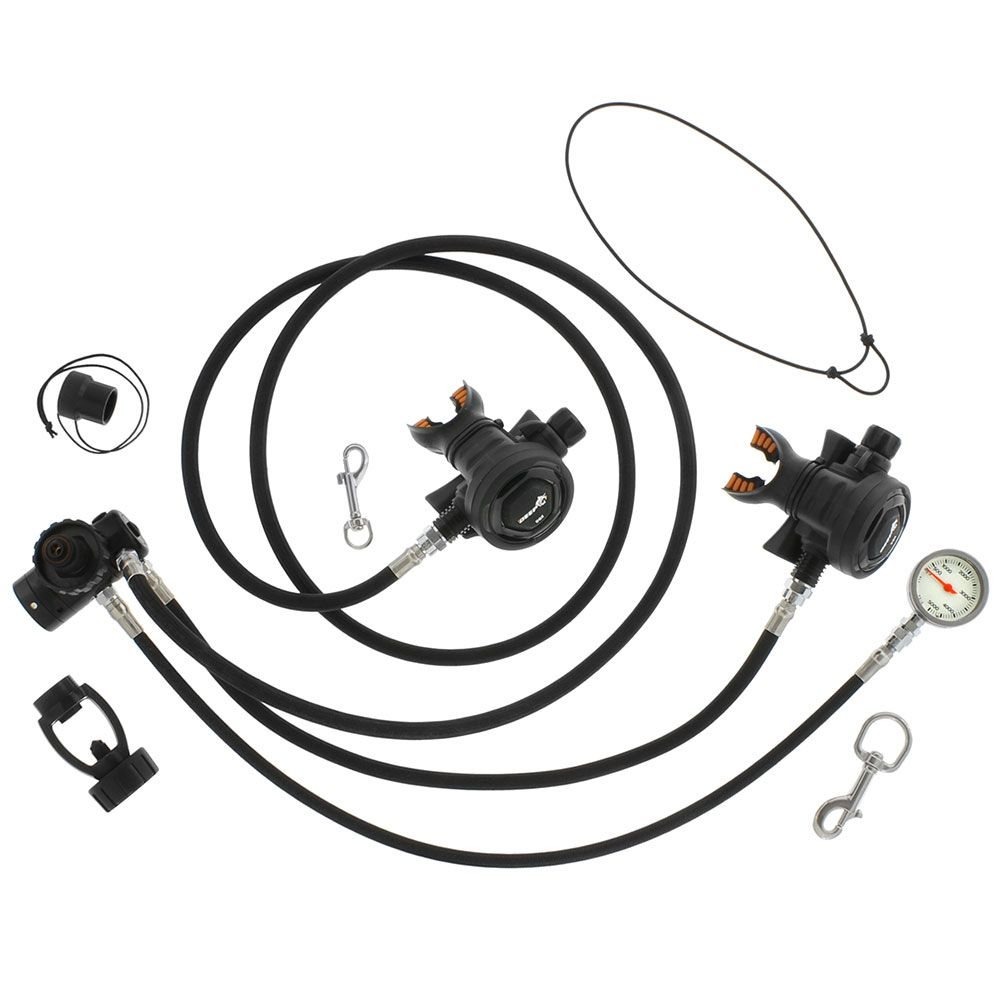
The regulator lets you breathe underwater and has two stages.
The first stage reduces cylinder pressure to intermediate pressure — about 8–10 bar above ambient. Intermediate pressure rises with depth together with ambient pressure. Designs are piston or diaphragm; balanced first stages deliver steadily regardless of cylinder pressure; "overbalanced" ones raise intermediate pressure slightly more than ambient at depth, easing breathing of dense gas. Diaphragm stages with an environmentally sealed (dry) chamber are less prone to freezing.
The second stage delivers gas at ambient pressure on demand: 1 bar at the surface, 3 bar at 20 m.
- Unbalanced second stage: the valve is held closed by a spring against intermediate pressure; breathing effort depends on intermediate pressure.
- Balanced: part of the intermediate pressure is fed into a balance chamber and offsets the valve — the spring is lighter, breathing is easier and more consistent.
Cold-water regulators (certified for water below 10 °C) are protected against freezing and suit any conditions; "warm-water" regulators must not be used in cold water.
A regulator set includes: primary second stage, alternate second stage (octopus) or an independent alternate gas source, BCD inflator hose and pressure gauge. Service follows the manufacturer's schedule, but at least once a year, even if unused.
4.4 Instruments
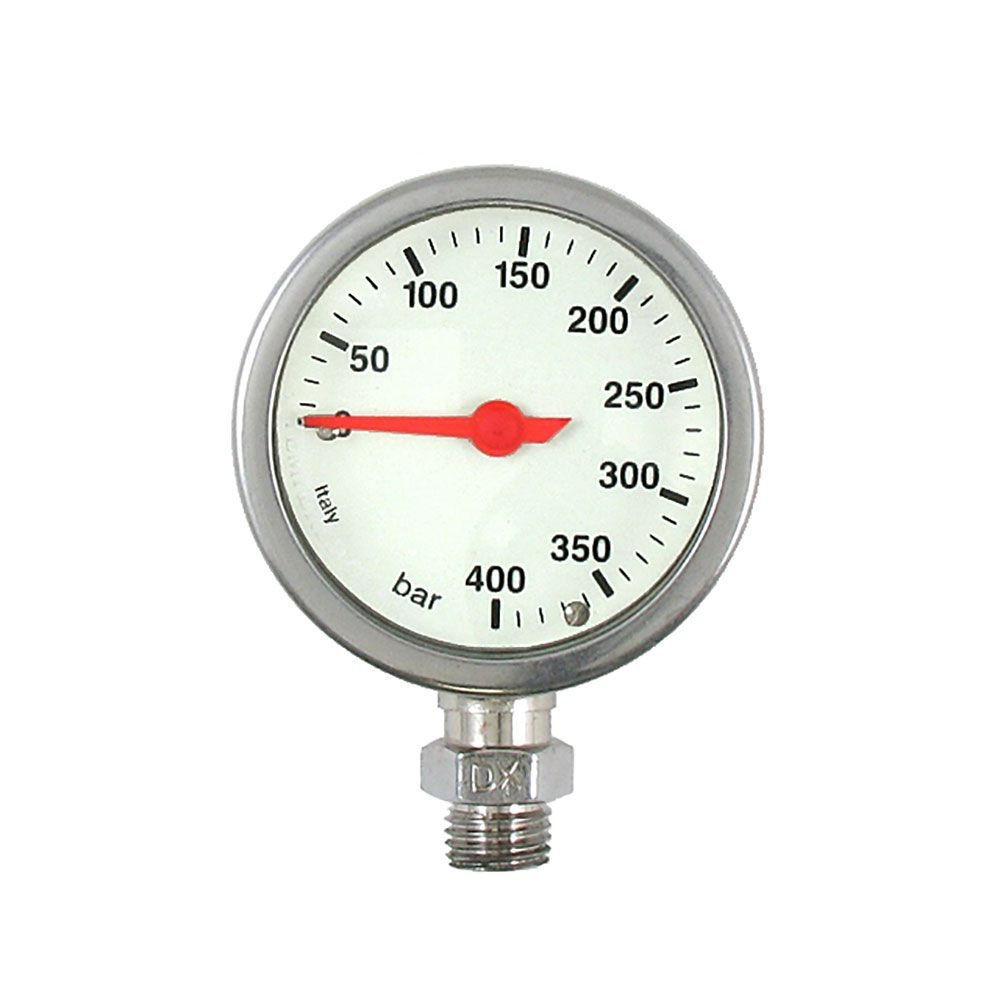
A diver monitors remaining gas, depth, time and direction.
- The pressure gauge (SPG) connects to the high-pressure (HP) port of the first stage and shows cylinder pressure (bar or psi). The red zone is the reserve: time to end the dive.
- A transmitter sends pressure to a wrist computer. Convenient, but the battery may die or the signal drop out, so a transmitter is used only together with a mechanical gauge.
- Depth gauge and watch have been almost entirely replaced by the computer but can serve as backups.
- An underwater compass has a liquid-filled housing.
4.5 Dive computer
A computer continuously tracks the dive profile, calculates no-decompression time, warns of its end, of exceeding depth and ascent rate, and guides the safety stop. IDU places special emphasis on computer training: today it is an essential part of a diver's kit.
Basic functions of a recreational computer:
- Depth, time, temperature.
- No-decompression limit calculation.
- Alarms for exceeding limits (no-deco, depth, ppO₂, ascent rate).
- Nitrox capability.
- Residual nitrogen tracking, time to fly.
- Dive log.
When choosing, consider: display readability and visible alarms, intuitive controls, user-replaceable or rechargeable battery, service availability. Check charge and settings before a trip. Technical diving requires multi-gas computers; a simple recreational computer will later serve as a backup.
4.6 Accessories
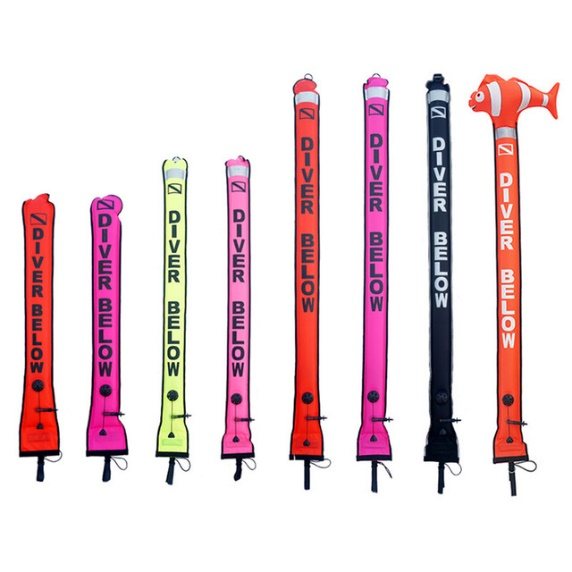
A surface marker buoy (SMB) marks the ascent point and protects against boats. Closed SMBs or those with a valve are preferred — they don't lose gas on the surface. Length at least 1.5 m, in waves and currents at least 2 m. The standard colour is orange; in some regions a yellow buoy means "need assistance" — agree on this with the support team before the dive.
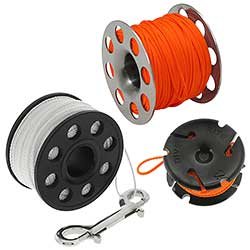
A spool or reel is used to deploy the SMB, mark a point or search. A spool is enough for a recreational diver: compact and inexpensive. Line length at least 12 m (preferably 20–30 m — more than the depth from which you will deploy the SMB). For thick gloves choose a spool with a wide finger hole.
Lights — primary and backup. Today almost all dive lights are LED: compact and efficient. Requirements: rated for the planned depth, burn time with a large margin over the dive time. On a night dive carry at least one backup light (batteries are convenient in backups — they fade gradually). A light is also a communication tool.
Cutting tools (knife, line cutter, shears) free you from nets, fishing line and ropes. They must be compact, reachable with either hand; carry two (e.g. knife + line cutter) mounted in different places.
4.7 Equipment assembly
- Analyse the gas in the cylinder and label the cylinder with the result.
- Stand the cylinder in front of you, valve outlet facing away.
- Slide the BCD band over the cylinder and tighten; lift the BCD by the shoulder straps — the cylinder must not slip.
- Attach the regulator: second-stage hoses on the right.
- Connect the inflator hose.
- Check the second stages before opening the valve: you cannot inhale, you can exhale freely — diaphragms and valves are intact.
- Slowly open the valve fully.
- Check pressure on the gauge.
- Breathe from each second stage while watching the gauge: the needle must not move (do not do this check on the surface in freezing conditions).
- Clip the gauge to the left hip D-ring.
- Inflate the BCD until the overpressure valve vents — checks inflator and valve; leave for 3 minutes — leak check.
- Check the dump valves and the inflator deflate button.
- Fit the weights and make sure they are secure.
- If the cylinder cannot be secured upright, lay it down with hoses tucked in.
Disassembly — in reverse: close the valve, purge the regulator, disconnect the inflator and the regulator, fit the first-stage dust cap.
4.8 Care and storage
- Rinse all equipment in fresh water after diving. Keep water out of the first stage — never immerse it, even with the dust cap on.
- Dry in the shade: sunlight degrades materials.
- Store in a dark, dry, ventilated place.
- Suit on a wide hanger; BCD slightly inflated; regulator without kinked hoses; neoprene laid flat; mask in its box; fins flat or hanging.
- All equipment requires regular servicing.
Knowledge check
10 questions
The Aquatic Environment: Vision, Light, Sound, Heat
Vision underwater, light and colour, sound, heat loss, hypothermia and overheating.
5.1 Vision underwater
Without a mask everything underwater is blurred: the eye is built for light reaching the cornea from air. Water is optically close to the tissues of the eye, so the cornea almost stops refracting light and the image no longer focuses on the retina. A mask restores an air space in front of the eye and vision becomes sharp.
But at the water–glass–air boundary light is refracted again: objects appear about one-third larger and one-quarter closer than they really are. That is why beginners often reach short of an object and fish look bigger. The field of view in a mask is also narrower — turn your head more often.
5.2 Light and colour
The deeper you go, the less light there is. Light levels depend on:
- the sun's angle — the lower it is, the more light is reflected from the surface (morning, evening, high latitudes);
- surface conditions (waves);
- suspended particles — organic and inorganic matter, plankton.
So at 10 m in the Red Sea it is almost as bright as near the surface, while at the same depth in the Barents Sea it may be nearly dark.
Water absorbs light selectively and acts as a blue filter. With depth, red disappears first (within the first 5–10 m), then orange and yellow, then green; blue penetrates furthest — at depth everything looks blue-grey. A torch restores natural colours — one reason to carry a light even by day in clear water.
5.3 Sound
Sound travels about 4.5 times faster in water than in air (≈1500 m/s versus ≈340 m/s). On land the brain locates a sound by the difference in arrival time at the right and left ears. Underwater this difference is too small, and sound is also conducted through the skull — so a diver hears well but cannot tell the direction of a sound source: an approaching boat or a buddy's signal.
Practical conclusion: if you hear an engine, do not surface at random — ascend slowly, looking around and rotating, with one hand above your head, and use an SMB.
5.4 Thermal conductivity and hypothermia
Water draws heat away about 25 times faster than air. So even in the tropics (28–30 °C, against a normal body temperature of 36.6 °C) an unprotected diver gradually cools.
Hypothermia is a drop in body temperature below 35 °C. The body defends itself: shivering produces heat, skin vessels constrict to reduce heat loss, and blood is concentrated around the internal organs and brain.
| Degree | Body temperature | Signs |
|---|---|---|
| Mild | 35–32 °C | intense shivering, blue lips and skin, clumsiness, difficulty speaking and thinking |
| Moderate | 32–28 °C | shivering weakens or stops, drowsiness, confusion |
| Severe | below 28 °C | stupor, unconsciousness, risk of respiratory and cardiac arrest |
Prevention: correct thermal protection (suit thickness table — Chapter 3), a hood, and ending the dive at the first signs of shivering. Individual sensitivity to cold varies, and the body cools more on repetitive dives.
First aid for hypothermia:
- move the casualty to a dry, warm place sheltered from the wind;
- remove the wet suit, dry them, dress them in warm dry clothes and cover them (blanket, rescue blanket);
- if conscious — warm (not hot) sweet drinks;
- for moderate and severe hypothermia — keep them lying down, handle gently, call medical help.
Do not:
- give hot showers, saunas or hot packs on the limbs — sudden dilation of peripheral vessels draws blood away from the internal organs;
- give alcohol — it dilates skin vessels and increases heat loss; the feeling of warmth is false;
- rub with alcohol or massage vigorously — for the same reason.
5.5 Overheating
Overheating (hyperthermia) is dangerous mainly because of dehydration: heavy sweating thickens the blood and impairs circulation, which is a risk factor for decompression sickness. Do not put on your wetsuit long before the dive in heat and sun; if necessary, wet your suit and head with water and stay in the shade.
If a diver feels unwell from the heat — help them out of the wetsuit, move them to a cool, shaded, ventilated place and give plenty to drink (water or oral rehydration solution; coffee, strong tea and alcohol increase dehydration). With confusion and a high body temperature (heatstroke) — active cooling and medical help.
Knowledge check
8 questions
Air Spaces and Barotrauma
Equalisation; ear, sinus, mask, dental and lung barotrauma; first aid.
6.1 Air spaces in the body
Body fluids and tissues are practically incompressible, but gas in air spaces obeys Boyle's law. Spaces that matter to divers:
- the middle ear — connected to the throat by the Eustachian tube;
- the paranasal sinuses — frontal, maxillary, sphenoid, ethmoid;
- the lungs;
- the mask air space and, in a drysuit, the suit air space;
- cavities in teeth under poor fillings, gas in the intestines.
The greatest change in gas volume occurs near the surface (Chapter 2) — which is why ear problems usually occur in the first metres of descent.
6.2 Equalisation
On descent water presses on the eardrum from outside. The regulator supplies gas at ambient pressure, but the Eustachian tube is normally closed — gas does not enter the middle ear by itself. It has to be opened:
- Valsalva manoeuvre — pinch the nose and gently blow into it;
- Frenzel manoeuvre — pinch the nose and push with the tongue/throat, as when saying "k";
- swallowing with the nose pinched (Toynbee), moving the jaw.
Equalisation rules:
- start at the surface and equalise early and often — about every metre in the first metres of descent, before you feel discomfort;
- descend feet first, controlling your speed (a descent line helps);
- if your ears won't clear — ascend 1–2 m and try again; never force equalisation;
- if it still fails — abort the dive.
Healthy sinuses equalise by themselves. The mask air space is equalised by exhaling through the nose into the mask during descent; otherwise — mask squeeze: marks, bruising, burst blood vessels in the eyes.
6.3 What barotrauma is
Barotrauma is tissue damage caused by a pressure difference between an air space and the surroundings. On descent gas in a space is compressed ("squeeze"); on ascent it expands.
Middle-ear barotrauma
Occurs on descent if the diver did not equalise in time or could not (cold, allergy). Pressure stretches the eardrum inwards; bleeding, swelling or rupture may follow. Signs: fullness, pain, reduced hearing, pain when pressing the tragus; with a ruptured eardrum — sudden vertigo as cold water enters. Help: stop diving, put nothing in the ear yourself, see an ENT doctor.
Reverse block
Occurs on ascent: because of a swollen Eustachian tube (cold, allergy, decongestant wearing off) expanding gas cannot escape from the middle ear or sinuses. The eardrum bulges outwards with severe pain. Action: stop the ascent, descend 1–2 m, ascend slowly to let gas escape; do not perform a Valsalva. The only prevention is not diving with a cold or allergy.
Inner-ear barotrauma
The most dangerous ear barotrauma. Most often caused by an overly forceful Valsalva: a sudden pressure spike can damage the round or oval window of the inner ear. Signs: severe vertigo, nausea, vomiting, ringing in the ears, hearing loss, loss of balance, pallor, sweating. Help: stop diving, rest with the head raised, no equalising or straining, see a doctor urgently. The same symptoms occur in inner-ear decompression sickness — if they appear after a dive, give oxygen and act as for DCS (Chapter 7). If vomiting — recovery (lateral) position.
Never dive with cold or allergy symptoms. Decongestant drops and tablets work only temporarily; their effect may wear off underwater and cause a reverse block.
Sinus barotrauma
Swollen mucosa blocks the sinus openings — on descent or ascent there is sharp pain in the forehead, upper jaw or behind the eyes, sometimes a bloody nasal discharge. Prevention is the same — no diving with a cold or allergy.
Mask squeeze
Occurs if you don't exhale through the nose into the mask on descent. Signs: red marks, swelling, haemorrhages in the whites of the eyes. Usually resolves by itself; with severe haemorrhages or impaired vision — see a doctor.
Dental barotrauma
Gas under a poor filling or in a cavity may cause pain on descent or ascent, even a cracked tooth. See your dentist regularly.
Drysuit squeeze
If no gas is added to a drysuit on descent, the fabric pinches the body in folds — bruises and welts. Drysuit use is taught on the Dry Suit Diver IDU course.
6.4 Lung overexpansion injury
The most dangerous barotrauma. Cause — holding your breath during ascent: expanding gas ruptures the alveoli. Bronchitis, asthma and mucus in the airways are also dangerous — gas becomes "trapped" in part of the lung. The risk exists even when ascending from shallow depths — from 2–3 m in a pool.
The golden rule of diving: breathe continuously, never hold your breath. In an out-of-gas emergency ascent, exhale continuously, making an "aaah" sound.
Gas from damaged alveoli may enter:
- the blood — arterial gas embolism (AGE): bubbles travel to the arteries of the brain and heart. Signs appear quickly — during ascent or within minutes of surfacing: confusion or unconsciousness, convulsions, paralysis, numbness, speech and vision disturbances, chest pain, bloody froth from the mouth. Life-threatening;
- the pleural cavity — pneumothorax: sharp chest pain radiating to the shoulder, increasing shortness of breath, rapid shallow breathing, cyanosis; the casualty is more comfortable half-sitting;
- the mediastinum and under the skin — emphysema: pain behind the breastbone, voice change, difficulty swallowing, swollen neck, crackling when pressing the skin.
First aid:
- check consciousness and breathing; if absent — CPR;
- lay the casualty flat (with pneumothorax, half-sitting is acceptable if breathing is easier); if vomiting or with impaired consciousness — recovery position;
- give 100% oxygen as early as possible and without interruption;
- call an ambulance and say the casualty is a diver; contact the nearest hyperbaric chamber;
- monitor until help arrives; do not let the casualty go back underwater.
Knowledge check
10 questions
Breathing and Gases: CO₂, Stress, Saturation, DCS, Nitrogen Narcosis, Carbon Monoxide
Breathing and CO₂, hyperventilation, stress, saturation, DCS, nitrogen narcosis, carbon monoxide, cramps.
7.1 Breathing underwater
At the surface we don't think about breathing. Underwater, in an unfamiliar environment, instinct raises the alarm — breathing becomes fast and shallow. With experience anxiety fades and breathing returns towards normal.
The main trigger to breathe is the level of carbon dioxide (CO₂) in the blood, and CO₂ is produced by the muscles: the more work, the faster the breathing and the higher the gas consumption. That is why an experienced diver with good buoyancy and efficient finning uses noticeably less gas than a beginner — the Perfect Buoyancy Control IDU course is devoted to this.
Underwater, breathing is made harder by:
- gas density, which increases with depth — breathing takes more effort, and the breathing muscles themselves produce CO₂;
- regulator resistance — a good balanced regulator makes inhalation easier;
- dead space — the second-stage housing is added to the larynx and trachea, and exhaled gas lingers there.
Rapid shallow breathing ventilates the lungs poorly: fresh gas does not reach the alveoli, CO₂ builds up, causing breathlessness, air hunger, headache, panic and, in severe cases, unconsciousness.
Breathe slowly, deeply and rhythmically. If your breathing gets out of control — stop, hold on to something, take a few slow deep breaths with full exhalations; continue when your breathing has settled.
Holding your breath "to save gas" (skip breathing) is doubly dangerous: it causes CO₂ build-up (and ultimately higher gas consumption) and lung overexpansion injury if your depth decreases at that moment.
Golden rule: never hold your breath underwater.
7.2 Hyperventilation
Hyperventilation is rapid deep breathing beyond the body's needs, which lowers blood CO₂. Its dangers:
- before breath-hold diving (snorkelling, freediving) it suppresses the urge to breathe — oxygen runs out before the desire to breathe appears, and the person loses consciousness without warning, often just below the surface (blackout). Never hyperventilate before a breath-hold dive;
- at the surface under stress it causes dizziness, tingling fingers and air hunger — this can escalate into panic.
If your breathing gets out of control — slow it down with full slow exhalations.
7.3 Stress
Stress is a natural reaction to an unusual or threatening situation: cold, poor visibility, current, fatigue, equipment failure, peer pressure, lack of experience. Signs: rapid breathing, wide eyes, jerky movements, fixation on one object, ignoring the buddy's signals, a vertical position in the water. Uncontrolled stress leads to panic — the main cause of accidents.
Managing stress:
- Stop — Breathe — Think — Act: stop, regain control of your breathing, assess the situation, perform a practised procedure;
- plan dives within your training; don't give in to "everyone's going, so I'll go too";
- maintain your skills through regular practice;
- watch your buddy and intervene early — before stress turns into panic.
7.4 Gas solubility. Saturation and desaturation

According to Henry's law (William Henry, 1803), the amount of gas dissolved in a liquid is proportional to the partial pressure of that gas above the liquid. A diver breathes gas at increased pressure — nitrogen dissolves into the blood and tissues (saturation) until partial pressures equalise. On ascent the pressure drops and nitrogen leaves the tissues into the blood and is exhaled through the lungs (desaturation).
Think of a bottle of fizzy water: open it slowly and the gas escapes quietly; open it abruptly and the liquid foams with bubbles. A diver ascending at the correct rate "opens the bottle slowly".
Tissues saturate at different rates: there are fast tissues (blood, brain) and slow ones (joints, bone, fat). The longer and deeper the dive, the more nitrogen is absorbed. Recreational diving is based on no-decompression dives: saturation must not exceed the level at which mandatory decompression stops are needed for a safe ascent.
7.5 Decompression sickness (DCS)
DCS was first encountered on a large scale in the second half of the 19th century in caisson work — for example, building the Brooklyn Bridge (1870–1883) — hence its other name, caisson disease. In 1908 John Haldane proposed the first model of tissue saturation and staged decompression; his work was later developed by Robert Workman and Albert Bühlmann — their models underpin modern tables and computers.
DCS is a complex of injuries caused by inert-gas bubbles forming in tissues and blood when pressure drops too quickly: impaired circulation, damage to the nervous system and tissues.
Signs (usually within the first hour after the dive, but possible up to 24 hours):
- extreme fatigue, malaise;
- skin itching, rash, "marbled" skin (patches from red to blue-purple);
- joint and muscle pain;
- numbness, tingling, weakness, paralysis;
- dizziness, balance, hearing and vision disturbances;
- breathing difficulty, cough, chest pain;
- confusion, convulsions, unconsciousness.
Denial ("it's just a bruise, I'll sleep it off") is a common and dangerous mistake: give first aid whenever DCS is suspected.
How to avoid DCS:
- do not exceed the no-decompression limit; plan with a margin;
- observe the ascent rate (no faster than 9–10 m/min) and make a safety stop;
- make the deepest dive first in a series and the deepest part first in a dive;
- observe surface intervals and time to fly (per your computer; the generally accepted minimum is 12 hours after a single dive and 18 hours after a series, preferably 24 hours);
- after diving avoid heavy exertion, hot baths and saunas.
Risk factors (almost all impair the circulation that removes nitrogen):
- dehydration — sweating in the heat, dry cylinder air, alcohol, coffee; drink water before and after dives;
- hypothermia — peripheral vasoconstriction slows desaturation;
- heavy exertion during and immediately after the dive;
- alcohol before and after diving;
- age, excess weight, poor fitness;
- fatigue, lack of sleep, illness;
- fast ascents, repeated ascents and descents ("saw-tooth" profiles), multi-day dive series.
First aid for suspected DCS:
- remove the casualty's equipment and keep them at rest;
- lay them flat on their back; if vomiting or with impaired consciousness — recovery (lateral) position; if not breathing — CPR;
- give 100% oxygen as early as possible and continuously;
- if conscious and able to swallow — still water (no caffeine or alcohol);
- call an ambulance, say the casualty is a diver; arrange transport to a hyperbaric chamber;
- record the dive profile (send the computer with the casualty), the time symptoms appeared and how they developed; watch the buddy too — they dived the same profile.
Never try to treat DCS by going back underwater ("in-water recompression").
7.6 Nitrogen narcosis
As the partial pressure of nitrogen rises (Chapter 2), it begins to act on the nervous system like an anaesthetic. When breathing air, many divers can notice the first effects at 20–30 m, and the effect increases with depth. The sensations are individual and vary from day to day.
Signs:
- reduced concentration, slow thinking, errors in simple calculations;
- impaired fine motor skills;
- euphoria, overconfidence, "drunkenness";
- or, conversely, anxiety, depression, apathy, tunnel vision.
Narcosis is dangerous because the diver notices problems more slowly and makes worse decisions. It is increased by: fast descent, darkness and poor visibility, cold, heavy work and CO₂ build-up, fatigue, anxiety, alcohol and medication.
Action: stop, signal your buddy, ascend a few metres together. The symptoms quickly disappear with decreasing depth, without after-effects. For an OWD (to 18 m) narcosis is usually mild, but you must know its signs.
7.7 Carbon monoxide (CO) poisoning
Carbon monoxide binds to haemoglobin about 200–250 times more strongly than oxygen and blocks oxygen delivery to the tissues — above all to the brain. By Dalton's law its effect increases many times at depth: a concentration harmless at the surface becomes dangerous at depth.
The source of CO in cylinders is exhaust gas drawn into the compressor air intake: from the compressor's own engine or a generator, from a nearby car or boat, and also from an overheated or faulty compressor and filters.
CO has no colour and no smell. But its source — petrol or diesel exhaust — does smell. Therefore:
- before the dive, smell the gas from the cylinder by cracking the valve slightly: any smell of exhaust, oil or burning, or an odd taste — do not use the cylinder;
- no smell does not guarantee no CO — the reliable check is a CO analyser;
- fill only at reputable dive centres.
Signs of poisoning: headache, dizziness, nausea, weakness, confusion, unconsciousness; bright red lips are a late and unreliable sign. Help: 100% oxygen, rest, medical help.
7.8 Cramps
Muscle cramps (most often in the calf and foot) are triggered by fatigue, cold, unsuitable or overly stiff fins, poor finning technique and dehydration.
To relieve a calf cramp: stop, straighten your leg, grasp the fin tip and pull it towards you, massage the muscle gently. Then change your kick, reduce the effort; if it recurs — end the dive. Let your buddy know about the problem.
Knowledge check
10 questions
The Environment: Water, Currents, Waves, Marine Life
Fresh and salt water, currents, tides, surf, hazardous and venomous marine life.
8.1 Fresh and salt water
Fresh water has a density of about 1.00 kg/L, seawater 1.02–1.03 kg/L. The difference is small, but by Archimedes' principle salt water pushes the diver up more strongly: you need more weight in the sea than in fresh water (with the same equipment — usually 2–3 kg more for an adult diver). When switching between fresh and salt water, re-check your weighting.
Salinity varies between seas. The Red Sea is one of the saltiest (hot, almost no rainfall and no inflowing rivers), so more weight is needed there than, for example, in the Mediterranean or the Baltic.
Seawater is aggressive to equipment: salt crystallises as it dries and damages materials, and metal corrodes. After sea dives always rinse your equipment in fresh water before drying it.
8.2 Currents
Permanent currents are caused by the movement of large water masses driven by wind, differences in temperature and salinity, the Earth's rotation and the seabed topography. Variable currents are caused by tides.
Currents carry plankton — small fish follow, and large predators follow them. That is why current-swept sites are often the richest and most interesting.
Rules for diving in currents:
- entry and exit at the same point — start your route into the current and return with it, while you still have plenty of gas and energy;
- entry and exit at different points — drift with the current but don't miss the exit point; the boat follows the group's SMB;
- descend quickly using a line, stay close to the reef and bottom — the current is weaker there;
- don't fight a strong current — move shallower or into the shelter of the terrain; if you are being swept away — surface with an SMB;
- down- and up-currents near walls and headlands can pull you deeper or shallower — watch your depth and computer; if necessary move away from the wall and add gas to your BCD.
Strong ebbing currents that can carry a diver far from the exit point are dangerous. Beginners should plan such dives only with an experienced guide. More on this in the Drift Diver IDU course.
8.3 Tides
Tides are caused by the gravitational pull of the Moon and Sun. In most areas there are two high and two low tides a day (roughly every 6 hours). At the turn of the tide there is "slack water" — a period of weak current, convenient for diving in straits, lagoons and bay entrances. Before diving in tidal areas, study the tide tables: visibility often worsens on the ebb, and the current at a lagoon mouth can be very strong.
8.4 Waves, surf, rip currents
Waves make entries and exits, regrouping on the surface and boarding the boat more difficult, and cause seasickness and fatigue. In rough seas it is better to cancel the dive.
Surf — waves breaking near the shore. Rules:
- watch the surf for a few minutes — waves come in sets; choose a lull;
- enter fully equipped, regulator in your mouth and mask on; do not stop in the surf zone;
- pass through the surf line quickly, under the waves — diving under them or turning sideways;
- exit between sets of waves; do not stand up in the surf zone — crawl or swim to the shallows.
A rip current is a narrow flow running away from the shore through the surf line (through a gap in a reef or sandbar). Signs: a strip of dark, calm, murky water with foam where waves do not break. If caught in one, do not swim against it towards the shore: swim parallel to the shore until you are out of the flow, then return.
8.5 Behaviour underwater and hazardous marine life
Underwater we are guests. Most creatures show no aggression unless touched, cornered or fed.
Rule: underwater we are only spectators. Touch nothing — and nothing will touch you.
The same rule protects the reef: corals grow very slowly, and one fin kick can destroy years of growth. Good buoyancy is the best protection for both diver and reef.
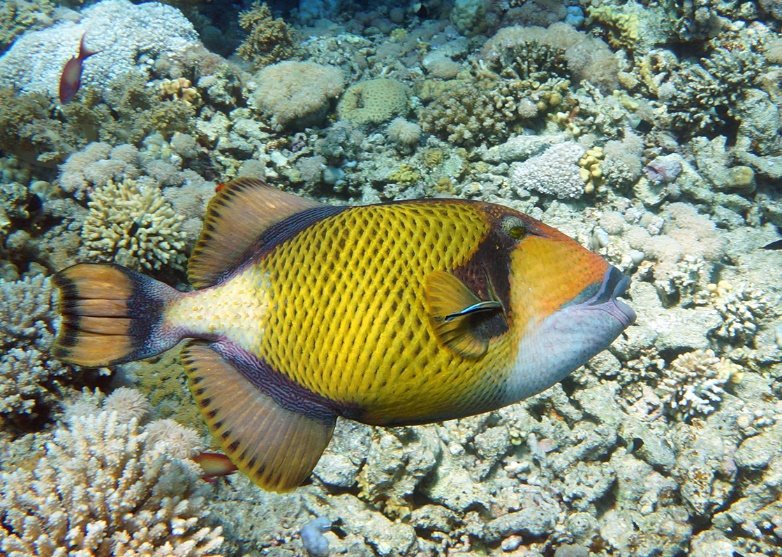
Territorial fish. The best known is the titan triggerfish (Balistoides viridescens). During breeding it guards a nest on the sand; its territory is shaped like a cone widening towards the surface and can extend several metres. An attacking triggerfish bites painfully. If attacked, swim horizontally away from the nest, not upwards (going up keeps you in its "cone"), shielding yourself with your fins. Even the little clownfish bravely defends its anemone.
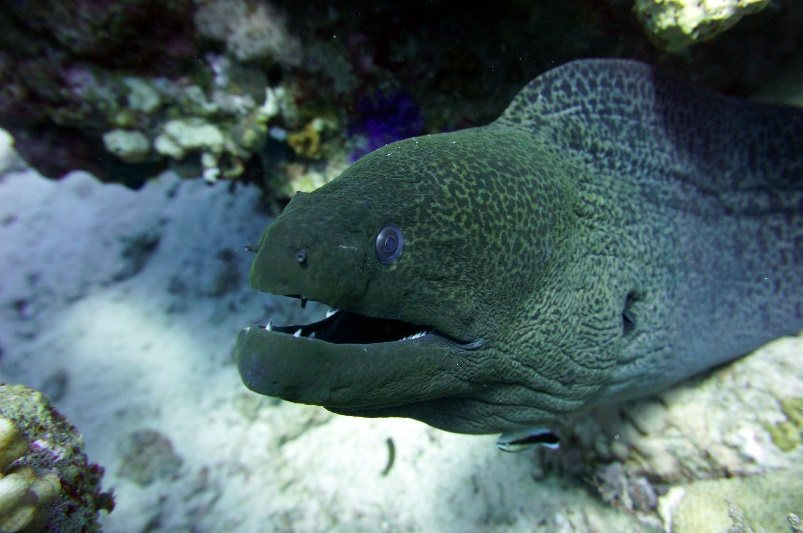
Moray eels are timid and hide in crevices. Don't put your hands into cracks and don't feed morays: smelling food, they may bite the feeding hand.
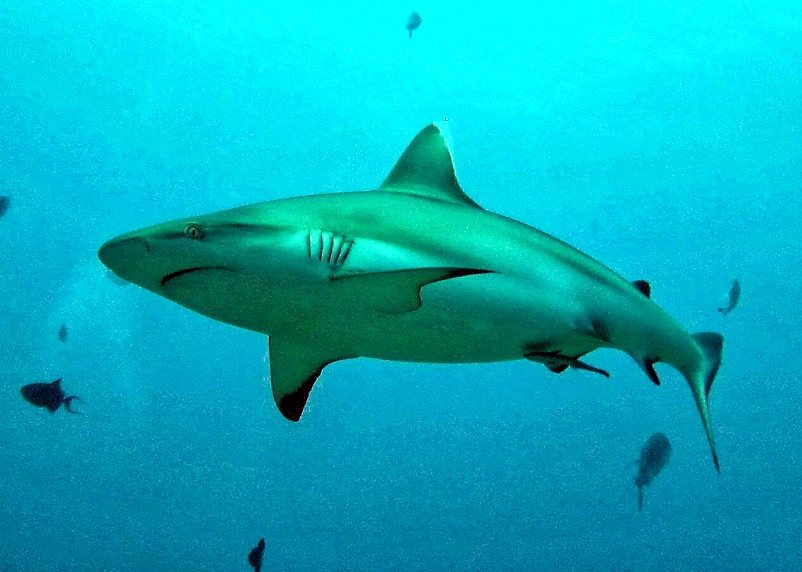
Sharks. Shark attacks are extremely rare: worldwide a few dozen unprovoked attacks are recorded each year, only a handful of them fatal, while humans kill tens of millions of sharks every year. Most attacks are a shark's mistake at the surface, where a swimmer resembles prey. Large species are considered potentially dangerous: the great white (Carcharodon carcharias), mako, tiger, bull, oceanic whitetip (Carcharhinus longimanus), hammerheads and Galapagos shark. Sharks have an excellent sense of smell and "ampullae of Lorenzini" — organs that detect the weak electric fields of a prey's muscles.
When meeting a potentially dangerous shark:
- stay together as a group, close to the bottom or the reef wall;
- move calmly without sudden movements; don't chase or corner the shark;
- keep watching the shark; don't turn your back on it;
- minimise time on the surface: board the boat quickly; never swim alone on the surface;
- if the shark shows interest (circling, approaching, arching its back) — calmly end the dive along the reef.
The largest fish, the whale shark (up to 18 m), is harmless and feeds on plankton.
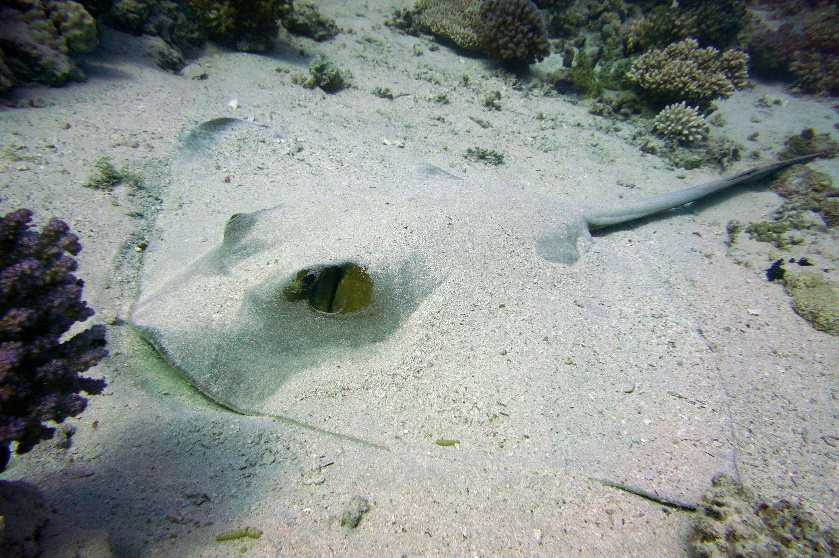
Stingrays are dangerous only because of the barb on the tail used in self-defence. Don't hover directly above a ray or block its path. When entering the water from a sandy shore, shuffle your feet — rays buried in the sand will swim away.
8.6 Venomous marine life and first aid
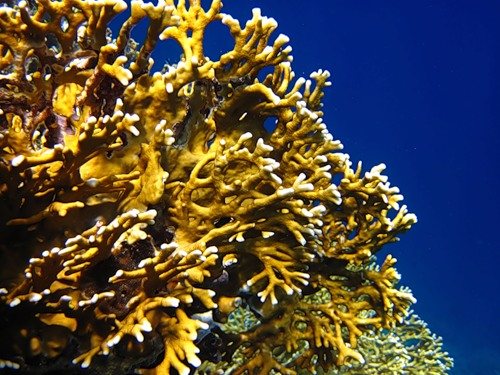
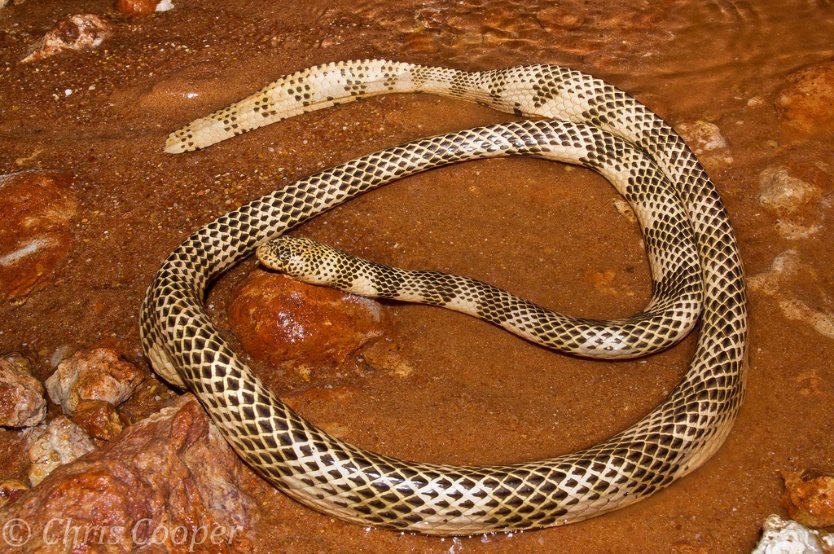
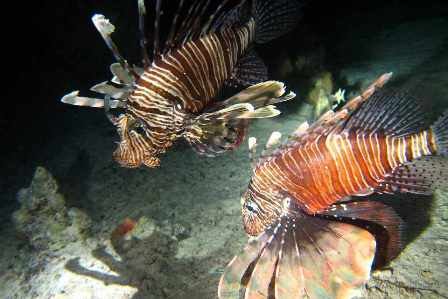
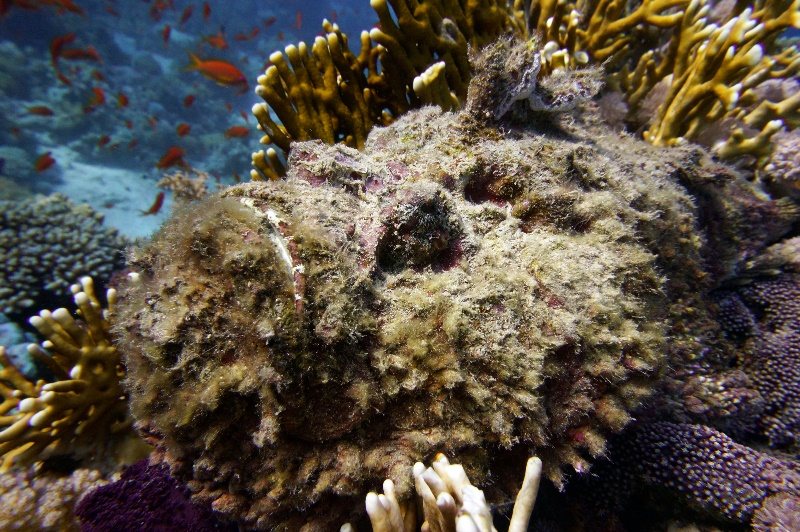
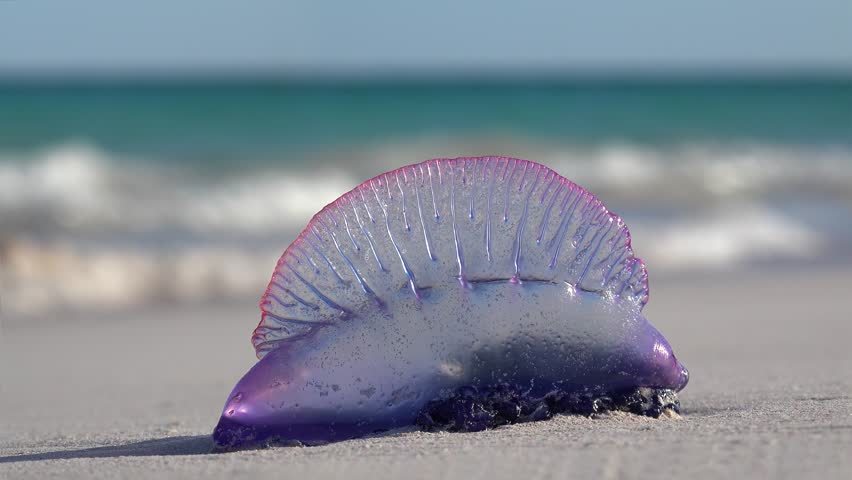
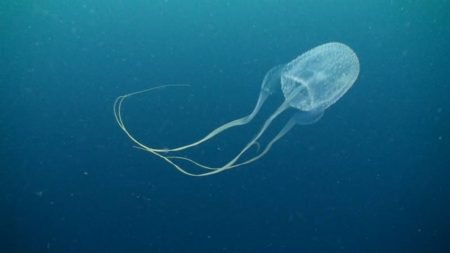
Venomous marine creatures can be roughly grouped as stinging (fire coral, jellyfish, anemones), spiny (scorpionfish, sea urchins), sea snakes and others.
Fire coral (Millepora) is actually a hydroid, not a true coral. Its stinging cells cause burning pain, redness and blisters. Help: rinse with seawater (not fresh water!), remove fragments, apply vinegar, cold compress, anti-itch and antihistamine products. Healing takes from a week to a month.
Sea urchins — long spines break off in the skin. Remove large visible fragments (don't dig deep), immerse the area in hot water (~45 °C), apply antiseptic; for deep punctures near joints — see a doctor.
Scorpionfish — lionfish, scorpionfish, stonefish. Usually mentioned with them is the crocodilefish — from the related flathead family (same order, Scorpaeniformes); its spines have not been shown to be venomous, but the spines on its head inflict painful wounds — treat it with the same caution, first aid is the same. The venom on the spines is a protein mixture causing excruciating pain, swelling and sometimes heart problems. The pain can be so severe that the diver loses control — a drowning risk. Never leave the casualty alone; help them ascend and get out of the water. No deaths have been recorded among reported lionfish stings; stonefish venom is the most dangerous, and an antivenom exists.
First aid:
- remove visible spine fragments;
- protein venom is destroyed by heat: immerse the affected part in hot water about 45 °C (as hot as tolerable without scalding) for 30–90 minutes;
- clean the wound and see a doctor; if not vaccinated — tetanus prophylaxis; for a stonefish sting — to hospital urgently (antivenom).
Sea snakes are highly venomous but not aggressive and do not attack divers; bites happen when someone tries to catch a snake. Help: rest, pressure bandage along the whole limb, immobilisation, urgent medical care.
Jellyfish. Stinging cells "fire" venom on contact; the effect ranges from mild irritation to death. General rules:
- get out of the water, don't rub the area, don't rinse with fresh water (it triggers remaining stinging cells);
- carefully remove tentacles with tweezers or a plastic card, not with bare hands;
- pain relief — hot water about 45 °C or a cold compress; with severe symptoms — see a doctor.
Specifics:
- box jellyfish and Irukandji — pour vinegar over the sting for at least 30 seconds, be ready for CPR, call for help urgently; antivenom is given by medics;
- Portuguese man o' war — no vinegar; rinse with seawater, hot water 45 °C;
- sea nettle, lion's mane — rinse with seawater, remove tentacles, hot water; tentacles of jellyfish washed up on the beach still sting.
Knowledge check
10 questions
Dive Planning: Gas Consumption and Minimum Gas Reserve
Planning principles, surface air consumption (SAC), minimum gas reserve (MGR), the dive plan.
9.1 Planning principles
The Open Water Diver IDU course prepares you for independent diving — which means a diver must not only be able to swim underwater but also plan and organise a dive. A plan rests on four principles:
- Do not exceed the no-decompression limit — the maximum time at the planned depth that requires no mandatory decompression stops.
- Enough gas to complete the dive, including the minimum gas reserve (MGR) and consumption — your own and your buddy's.
- Training — yours and your buddy's — matches the difficulty of the dive and the conditions: temperature, current, visibility, waves and wind.
- Comfort — the risk of the dive does not exceed the diver's comfort level and is justified by its purpose.
A well-trained diver understands the risks of a dive and plans it according to their own experience and their buddy's abilities.
9.2 Surface air consumption (SAC)
SAC (Surface Air Consumption) is a diver's gas consumption in litres per minute converted to the surface (1 bar). Knowing SAC, you get consumption at any depth by multiplying by absolute pressure:
Consumption at depth (L/min) = SAC × P abs
Consumption depends on workload, so SAC is measured in three modes:
- low workload — drifting, slow swimming;
- medium — swimming without current at a normal pace;
- high — swimming against a current, fast pace.
How to measure. At a pre-selected constant depth, record time (T), cylinder pressure (P) and depth (D) every 3–10 minutes. Example (12 L cylinder):
| T, min | P, bar | D, m |
|---|---|---|
| 3 | 190 | 15.3 |
| 8 | 170 | 15.7 |
| 13 | 150 | 15.1 |
| 18 | 130 | 14.9 |
| 23 | 110 | 15.2 |
| 28 | 90 | 15.0 |
- Measuring time: 28 − 3 = 25 min.
- Gas used: 190 − 90 = 100 bar → 100 / 25 = 4 bar/min.
- In litres: 4 × 12 = 48 L/min (at depth).
- Average depth: (15.3 + 15.7 + 15.1 + 14.9 + 15.2 + 15.0) / 6 = 15.2 m → P = 15.2/10 + 1 = 2.52 bar.
- SAC = 48 / 2.52 ≈ 19 L/min.
Repeat the measurement in all three modes to get three SAC values for planning in different conditions.
9.3 Minimum gas reserve (MGR)
The signal to begin the ascent is the end of the no-decompression limit or a remaining pressure equal to the minimum gas reserve (MGR) — whichever comes first.
MGR is the amount of gas two divers need to ascend safely from the maximum depth of the dive on one cylinder (if the buddy has run out of gas): at an ascent rate of no more than 9–10 m/min and with a 3-minute safety stop. Under stress consumption rises, so we assume SAC = 30 L/min for both.
Example: maximum depth 18 m, 12 L cylinders.
| Stage | Time | Depth (pressure) | Consumption per diver |
|---|---|---|---|
| Reaction: assess, give gas to buddy | 1 min | 18 m (2.8 bar) | 1 × 2.8 × 30 = 84 L |
| Ascent 18 → 5 m (13 m) | 2 min | average 11.5 → 12 m (2.2 bar) | 2 × 2.2 × 30 = 132 L |
| Safety stop | 3 min | 5 m (1.5 bar) | 3 × 1.5 × 30 = 135 L |
| Ascent 5 m → surface | 1 min | taken as 1 bar | 1 × 1 × 30 = 30 L |
| Total | 7 min | 381 L |
For two: 381 × 2 = 762 L. In a 12 L cylinder that is 762 / 12 = 63.5 bar. Round up to 65 bar and add 15 bar so that the cylinders are not completely empty at the surface:
MGR = 65 + 15 = 80 bar.
So on a dive to 18 m with a 12 L cylinder, the divers begin the ascent no later than when either diver's pressure reaches 80 bar. For a different depth, cylinder size or SAC, repeat the calculation the same way. On a multilevel dive MGR is calculated for each depth level: it is smaller at shallower depths.
Gas remaining at the surface. On a normal dive the MGR is not used up completely: the diver surfaces with a noticeable reserve. It is desirable to surface with 35–50 bar. Note: many dive centres require cylinders to be returned with at least 50 bar and impose penalties for less — take this into account when planning.
9.4 Gas planning for a dive
Example: 12 L cylinder, 200 bar, depth 18 m, no current, entry and exit at the same point. It takes 5 minutes to reach the reef and the same to return. SAC = 19 L/min.
- Gas available for the dive (excluding MGR): (200 − 80) × 12 = 1440 L.
- Gas for the swim out and back: 10 min × 19 × 2.8 ≈ 533 L.
- Left for the reef: 1440 − 533 = 907 L.
- Time at the reef: 907 / (2.8 × 19) ≈ 17 min.
At 5 + 17 = 22 minutes into the dive the diver turns back to the exit point and arrives there with at least the MGR (80 bar). Also check the no-decompression limit for 18 m in the table or on the computer: dive time must not exceed it.
A multilevel dive is calculated the same way — split into segments by depth and time.
9.5 Making a plan
The dive plan is agreed with the buddy at the briefing and includes:
- objective and route, entry and exit points, landmarks;
- maximum depth and time, no-decompression limit;
- gas: starting pressure, MGR, turn pressure, gas signals;
- descent and ascent procedure, safety stop;
- signals and actions if separated from the buddy and in emergencies;
- conditions: current, visibility, temperature, surface support.
Plan your dive — and dive your plan. If conditions change, change the plan or cancel the dive.
Knowledge check
10 questions
IDU No-Decompression Dive Tables and Dive Computers
Using the IDU tables, repetitive dives, the dive computer and its planner mode.
10.1 The no-decompression principle
All recreational dives are based on the principle of not exceeding the no-decompression limit: at any moment the diver can end the dive and ascend to the surface at a safe rate without mandatory decompression stops. A safety stop is nevertheless always recommended.
Planning tools are the IDU tables (the simplest and most accessible) and the dive computer (the most accurate). The IDU tables are for air; for Nitrox mixes they are used with the equivalent air depth (EAD) — this is taught on the Nitrox Diver IDU course.
10.2 How the IDU table works
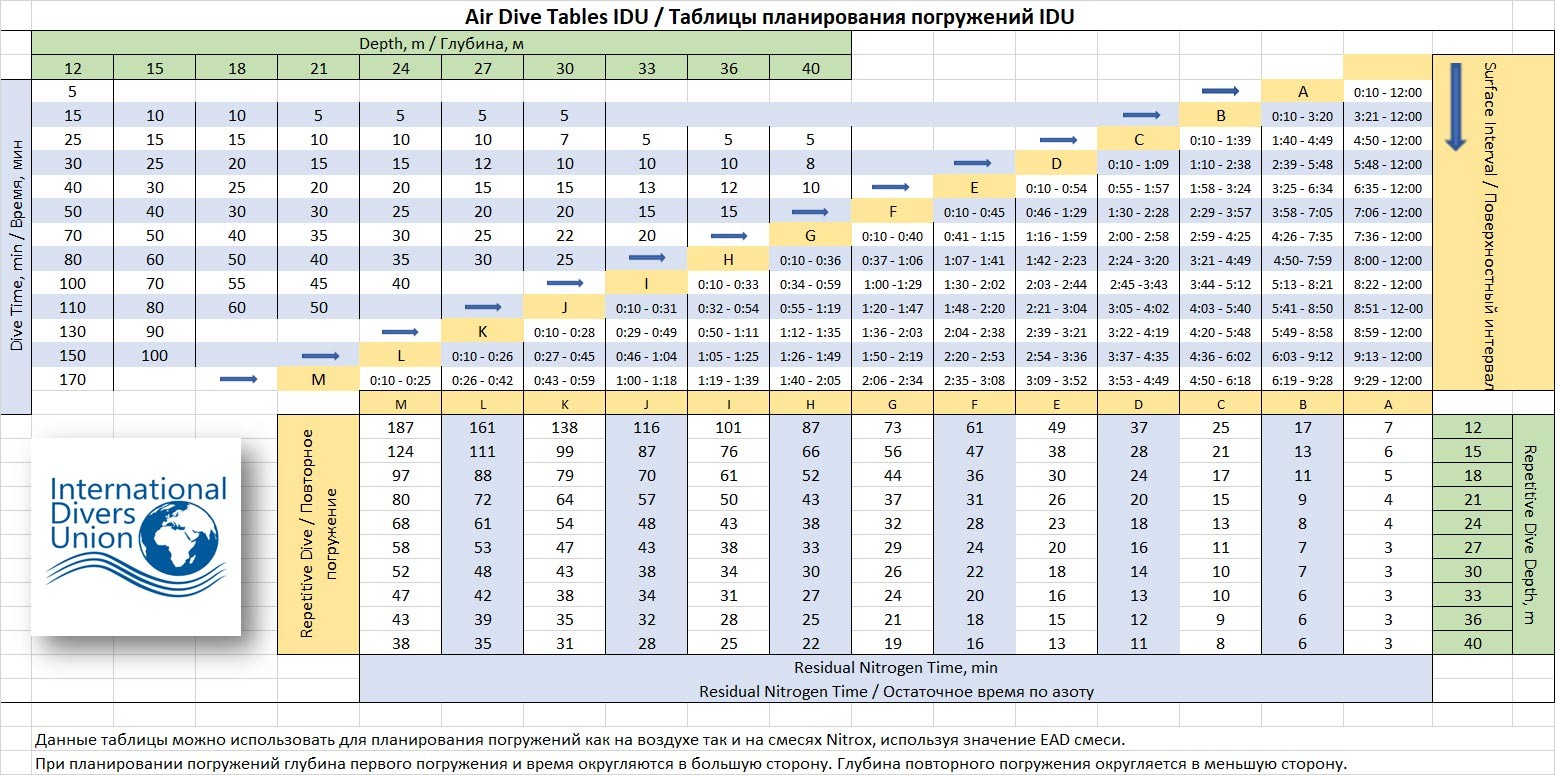
The table has three sections.
1. Dive data. Columns are depth (12, 15, 18 … 40 m), rows are time. The bottom value in each column is the no-decompression limit for that depth (for example, 170 minutes for 12 m). If the exact depth or time is not listed, round up to the next greater value. Moving right from the cell to the diagonal gives the pressure group (A … M) after the dive.
2. Surface interval. From the group after the dive, move right along the same row to the interval that contains your time on the surface, then down — this gives the new pressure group after the surface interval.
3. Residual nitrogen (RNT — residual nitrogen time). For the new group and the depth of the repetitive dive, the table gives a notional time "already used" before entering the water. It is subtracted from the no-decompression limit. When finding RNT, round the repetitive dive depth down — this gives a more conservative value.
The maximum depth for an IDU Open Water Diver is 18 m. Columns deeper than 18 m are used only after further training.
10.3 Worked example
First dive: 10 m, 45 minutes. Round up: column 12 m, row 50 minutes → group F.
Surface interval 90 minutes (1:30). In row F find the interval 1:30–2:28 → new group D.
Second dive to 12 m. For group D and 12 m, RNT = 37 minutes. The no-decompression limit for 12 m is 170 minutes:
170 − 37 = 133 minutes — the maximum time for the second dive.
If the second dive lasts 40 minutes, add RNT to find the group after it: 40 + 37 = 77 minutes → row 80 in the 12 m column → group H. Further dives are calculated the same way.
10.4 Table rules
- Round the depth and time of the first dive up.
- When finding RNT, round the repetitive dive depth down; take the repetitive dive's no-decompression limit from the column of its actual (rounded-up) depth.
- In groups K, L, M, extend the safety stop to 5 minutes.
- After a surface interval of 12 hours or more, the next dive counts as the first in a series.
- In cold water (≤ 18 °C) and with heavy exertion, use the next greater depth: for 13 m, the 18 m column instead of 15 m.
- Tables are accurate only for a simple square profile; for multilevel dives they give only a rough estimate.
10.5 Dive computer
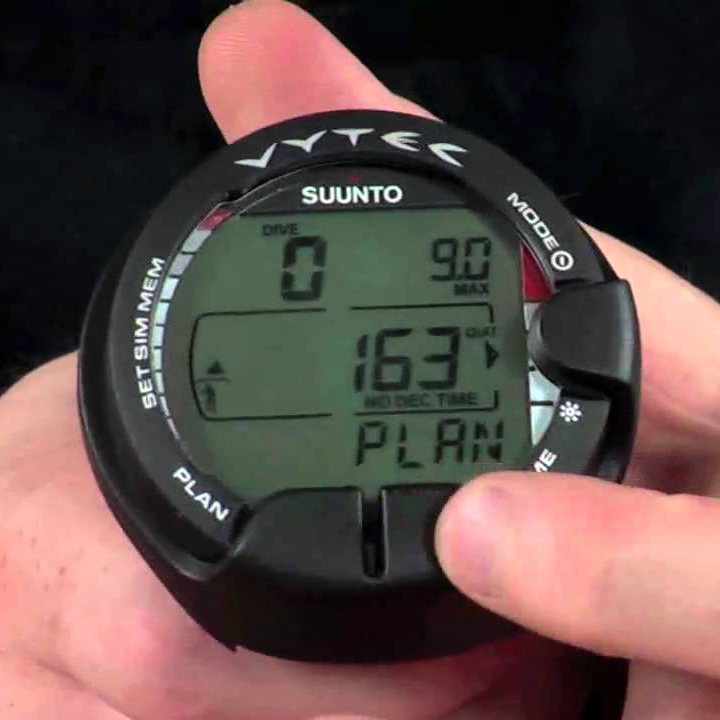
A computer continuously measures depth and time and calculates tissue saturation from the actual dive profile — so it is more accurate than tables, especially on multilevel dives. It shows the remaining no-decompression time, warns of excessive ascent rate and depth, guides the safety stop, tracks residual nitrogen and shows time to fly.
Planner mode. Before a repetitive dive, enter the planned depth — the computer shows the available no-decompression time taking residual nitrogen into account. If it is not enough — extend the surface interval or reduce the depth.
Rules for computer use:
- each diver has their own computer; don't swap or share computers during a series of dives — it "remembers" your saturation;
- if buddies use different computers, follow the more conservative one;
- check charge and settings (air/Nitrox, fresh/salt water) before the dive;
- if your computer fails underwater — begin the ascent with your buddy, make a safety stop, and don't dive again that day (or follow the manufacturer's recommendations);
- if the no-decompression limit is accidentally exceeded — follow the computer's decompression stop instructions and do not dive for at least 24 hours afterwards.
Knowledge check
10 questions
Dive Procedures: Buddy System, Checks, Descent and Ascent, Buoyancy, Navigation, Emergencies
Buddy system, equipment checks, entries, descent and ascent, buoyancy, navigation, emergencies.
11.1 The buddy system
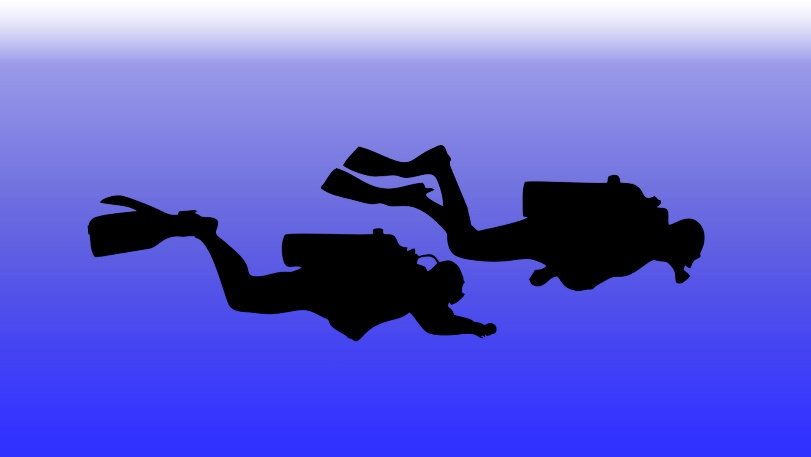
Underwater a diver relies on three principles: only I can think for myself, only I can breathe for myself, only I can swim for myself. A well-trained diver can handle problems alone, but a buddy makes it safer: extra hands, support, an alternate gas source.
- Every dive is made with a buddy.
- The distance between buddies allows immediate assistance — within a few metres, closer in poor visibility.
- Buddies see each other without effort. The best position is side by side at the same depth, the leader half a body length ahead and to the side. The worst is one above the other: the upper diver sees the lower one, but the lower diver has difficulty finding the buddy.
- Check your buddy's position at least once a minute.
- Signal your buddy before any action not agreed beforehand.
- Buddy diving also means mutual monitoring and joint equipment checks before the dive.
Buddy separation
Silt, terrain or current can cause loss of visual contact. Procedure:
- Stop. Look around, up and down; check your instruments; switch on your light — it is visible from afar even in murky water.
- Search for no more than one minute on the spot, turning slowly. Don't swim away — you will most likely move further from your buddy.
- Begin the ascent at a normal rate, deploy your SMB, make a safety stop.
- Wait for your buddy on the surface for 5–6 minutes, looking around and underwater (your buddy has also searched for a minute and is ascending).
- If not found — signal and report the missing buddy to the surface support. Do not organise a search yourself: coordinated action with the support team is more effective and allows help to be called in time.
The buddy-separation procedure must be discussed at the briefing.
11.2 Equipment checks
Checks are mandatory. They have three parts: the Pre-Dive Check (on land/boat), the Bubble Check (at the surface or at the start of the dive) and the S-Drill (at the start of the dive).
Pre-Dive Check
Done with your buddy once equipment is on. Each diver checks their own equipment and says it out loud while the buddy watches. Order — top to bottom:
- Mask (primary and spare, if carried).
- Cylinder valve — open.
- Pressure — state the gauge reading.
- Primary second stage — works; while breathing from it, watch the gauge: the needle does not move. Clip the gauge in place (do not breathe on the surface in freezing conditions).
- Primary second-stage hose — free and accessible.
- Alternate second stage — works, in place (do not breathe in freezing conditions).
- Inflator — works.
- BCD dump valves — work.
- All buckles and straps — fastened.
- Weights — in place, release accessible.
- Computer and compass — on, working, which wrist.
- Lights (if needed) — working, where attached.
- Cutting tool — where it is.
- SMB and spool — where they are.
- Fins.
Bubble Check
At the surface: the diver signals "bubbles"; the buddy inspects the valve, first stage, second stages, inflator (and drysuit valve) by putting them under water. No leaks — "OK" signal, then swap roles.
Underwater (at the start of the dive, at 3–5 m): buddies hover facing each other; the checker signals "bubbles" and "turn around"; the buddy turns slowly through 360°; the checker inspects possible leak points and signals "OK". Then swap roles.
S-Drill
Performed after the Bubble Check at 3–5 m to confirm that the diver can quickly hand the primary second stage on the long hose to the buddy:
- The checker signals "S-Drill".
- The buddy switches from the primary to the alternate second stage.
- Frees and deploys the primary hose, showing that it is accessible.
- After the "OK" signal, restows the hose and switches back to the primary.
- Buddies swap roles.
11.3 Entries and exits
From a boat:
- giant stride — from a high deck or platform: holding mask and regulator, step forward, BCD partly inflated;
- back roll — from the low side of a boat (inflatable): sitting with your back to the water, holding mask and regulator, roll backwards;
- seated entry — from a low platform or pool edge: sit, turn and slide gently into the water.
Before entering make sure the area below is clear (no divers, boats or obstacles); afterwards signal "OK" and move away from the entry point.
From shore: assess waves and surf (Chapter 8) and enter fully equipped; put fins on in waist- or chest-deep water holding on to your buddy, or lying down in the shallows. On sandy bottoms shuffle your feet.
Exiting onto a boat: approach the ladder one at a time, never stay under the ladder or behind the stern near the propellers; remove your fins and climb up with regulator in your mouth and mask on until you are out of the water. Exiting onto shore — in reverse, taking the surf into account.
11.4 Descent
- On the surface adopt a vertical position: it is easier to look around and to vent the BCD.
- Agree the descent with your buddy ("down" signal), note the time, switch from snorkel to regulator.
- Fully deflate the BCD, exhale — begin descending feet first without finning.
- Equalise early and often (Chapter 6).
- As you descend, move to a horizontal position and add gas to the BCD to stop above the bottom without touching it.
Control your descent rate: movement underwater has inertia, and a fast descent increases narcosis and hinders equalisation. The recommended maximum descent rate is no more than 20 m/min.
11.5 Ascent and safety stop
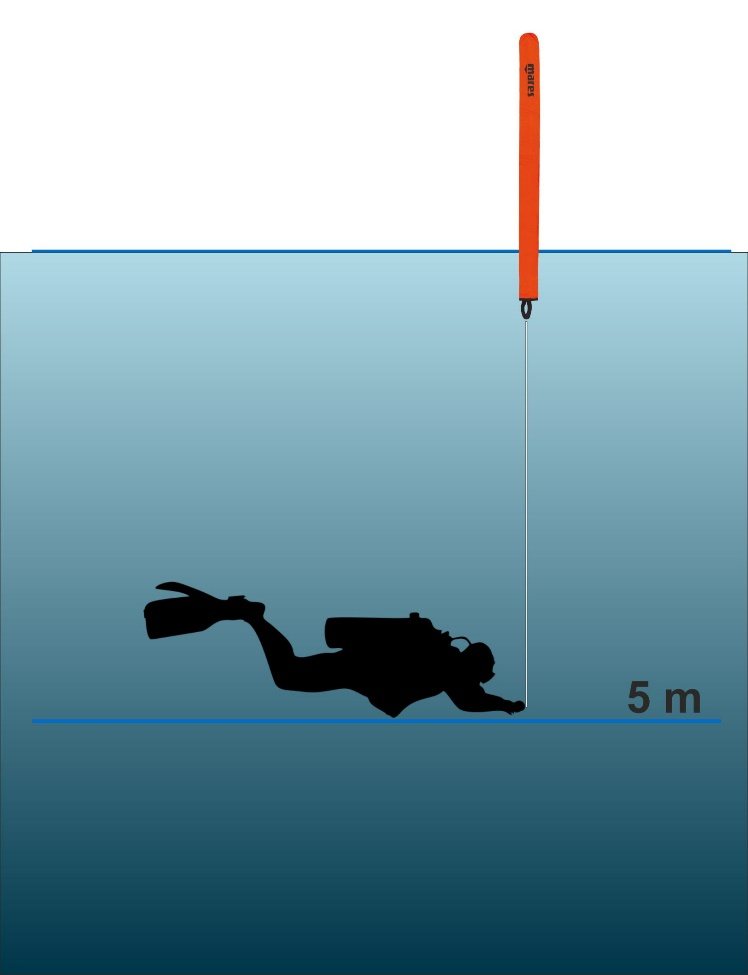
During ascent pressure drops and nitrogen leaves the tissues. Too fast an ascent — like a fizzy bottle opened abruptly — leads to DCS, and holding your breath leads to lung overexpansion injury.
- Ascent rate — no more than 9–10 m/min (watch your computer), slower near the surface.
- Begin the ascent together with your buddy on the "up" signal; stay horizontal, vent the BCD, breathe continuously.
- Safety stop — at 3–6 m for at least 3 minutes (5 minutes in groups K, L, M of the table). It is a recommended procedure that reduces DCS risk — always make it. Computers automatically start safety-stop mode after ascending above 6 m.
- After the stop, adopt a vertical position, raise a hand above your head, ascend slowly looking around and rotating; use an SMB. At the surface inflate the BCD and signal "OK".
11.6 Buoyancy control
Neutral buoyancy is the diver's core skill. It saves effort and gas, prevents injury and protects the reef.
- Don't overweight — excess weight has to be compensated with gas in the BCD.
- Keep minimal gas in the BCD — the more there is, the more buoyancy changes with depth.
- Breathe steadily: full lungs lift you, empty lungs lower you; use breathing for fine adjustment.
- Stay horizontal: gas doesn't collect in one part of the BCD or drysuit.
- Add and vent gas in small amounts and wait for the effect.
- Weighting check: at the surface with an empty BCD and a normal breath you float at eye level and begin to sink as you exhale; at the end of the dive with a nearly empty cylinder you must be able to hold the safety stop comfortably.
- Practise regularly — without practice the skill fades.
11.7 Basic underwater navigation
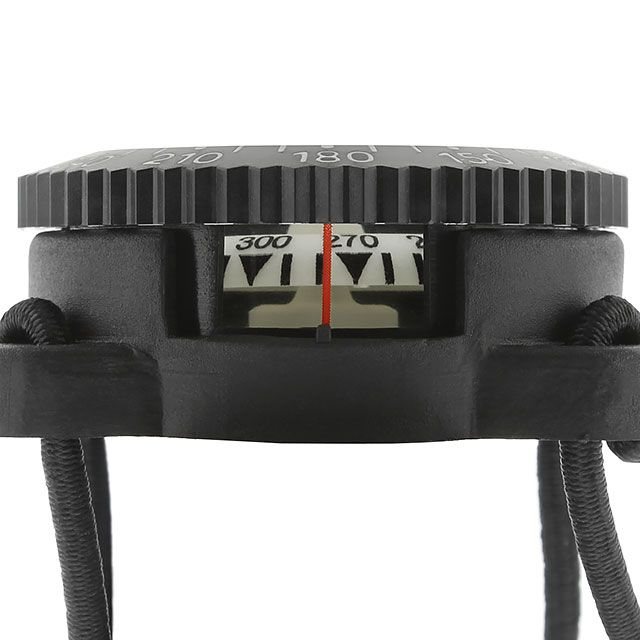
Navigation is needed to reach an objective out of sight, return to the exit point and follow a planned route.
- Natural navigation: bottom topography, rocks, coral pinnacles, sand ripples, slope direction, current, the sun's position. Move from one landmark to the next and remember them for the return.
- Compass: a scaled card in a liquid-filled housing, a "lubber line" and a side window. A heading is the angle between north and the direction of travel. Hold the compass level, lubber line along your body's axis.
- Reciprocal heading: heading ± 180° (e.g. out 60° — back 240°).
- Distance: estimate by time or by kick cycles measured in advance.
More in the Underwater Navigation IDU course.
11.8 Body position and finning techniques
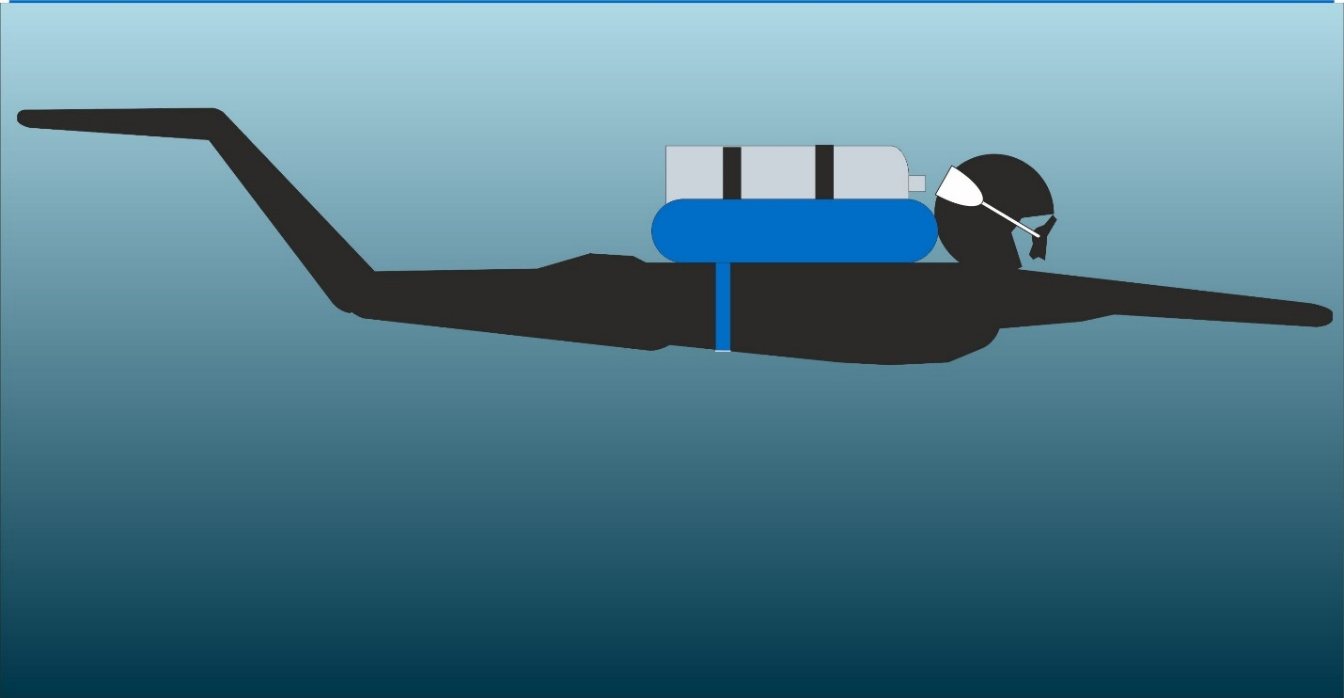
The smaller the body area across the direction of travel, the lower the drag. The correct position is horizontal, parallel to the surface (or bottom), knees bent, fins raised.
- Frog kick — the main, most efficient kick; the water is pushed back and up — the bottom is not disturbed.
- Modified frog — small amplitude, mainly the feet work: slow, careful movement close to the bottom and objects.
- Flutter kick (legs work from the hip) — for a short burst, e.g. against a current; tiring and can stir up silt.
- Modified flutter — knees bent, only the feet work: for tight spaces and near the bottom.
- Back kick — to move away from an object without turning; one of the hardest skills.
- Helicopter turn — turning on the spot with minimal fin movement.
Finning techniques are learned with an instructor — they cannot be learned from a book or video. The Perfect Buoyancy Control IDU course will help you perfect them.
11.9 Underwater emergencies
- Free-flow second stage: don't let go of the regulator — keep it in your mouth with lips slightly open and breathe, letting excess gas escape; switch to the alternate or to your buddy and end the dive.
- Out of gas: signal "out of gas" to your buddy, take gas from them (primary on the long hose or alternate), hold on to each other and begin a joint ascent with a safety stop.
- Controlled emergency swimming ascent (if no buddy is nearby and depth is shallow): ascend with the regulator in your mouth, exhaling continuously ("aaah"), no faster than 18 m/min, controlling buoyancy.
- Entanglement: stop, don't spin, call your buddy, free yourself slowly, use a cutting tool if needed.
- Dropping weights — a last resort when buoyancy cannot be established any other way (at the surface — to stay afloat).
Knowledge check
10 questions
First Aid, Insurance, Travel, Logbook and Further Training
First aid, insurance, travel, first aid kit, logbook and further IDU training.
12.1 First aid on dives
Every dive is backed by surface support: a first aid kit, an oxygen kit (100% O₂), communications to call for help, a boat or shore access, and a Divemaster-level professional or higher. Know in advance where the nearest hospital and hyperbaric chamber are and how to contact them.
General procedure in an accident:
- Assess safety — don't become a second casualty.
- Get the casualty out of the water and remove their equipment.
- Check consciousness and breathing; if absent — call for help and start CPR.
- With any suspicion of DCS or lung overexpansion injury — lay flat and give 100% oxygen (Chapters 6, 7).
- Call for help and say the casualty is a diver.
- Record the dive profile, the time and development of symptoms; hand them to the medics together with the casualty's computer.
First aid and CPR are taught on the Emergency First Aid IDU course — we recommend it to every diver.
12.2 Diver insurance
Diving involves risks, and treatment — especially in a hyperbaric chamber — is expensive. Diving insurance helps you deal with this at minimal cost.
- Travel insurance with a "diving" option — suits occasional trips. Read the contract carefully: is the hyperbaric chamber covered and to what extent, is there a depth limit (often 18–30 m), is a certification required, which countries and types of dives are excluded.
- Annual diver insurance — convenient for those who dive often and travel a lot.
Before a trip, ask your insurer how exactly the policy works in the destination country: which clinics and chambers they have agreements with, who pays for treatment on the spot, the emergency phone number. Make sure the insurance actually works where you will dive — in practice this varies from country to country.
12.3 Diving and travel
Diving opens up the planet's most pristine places. There are two main types of trip:
- daily diving — a day of diving with a return to shore; easy to combine with a hotel holiday;
- liveaboard safari — a trip on a specially equipped boat-hotel for 3 days or more: remote sites and more marine life.
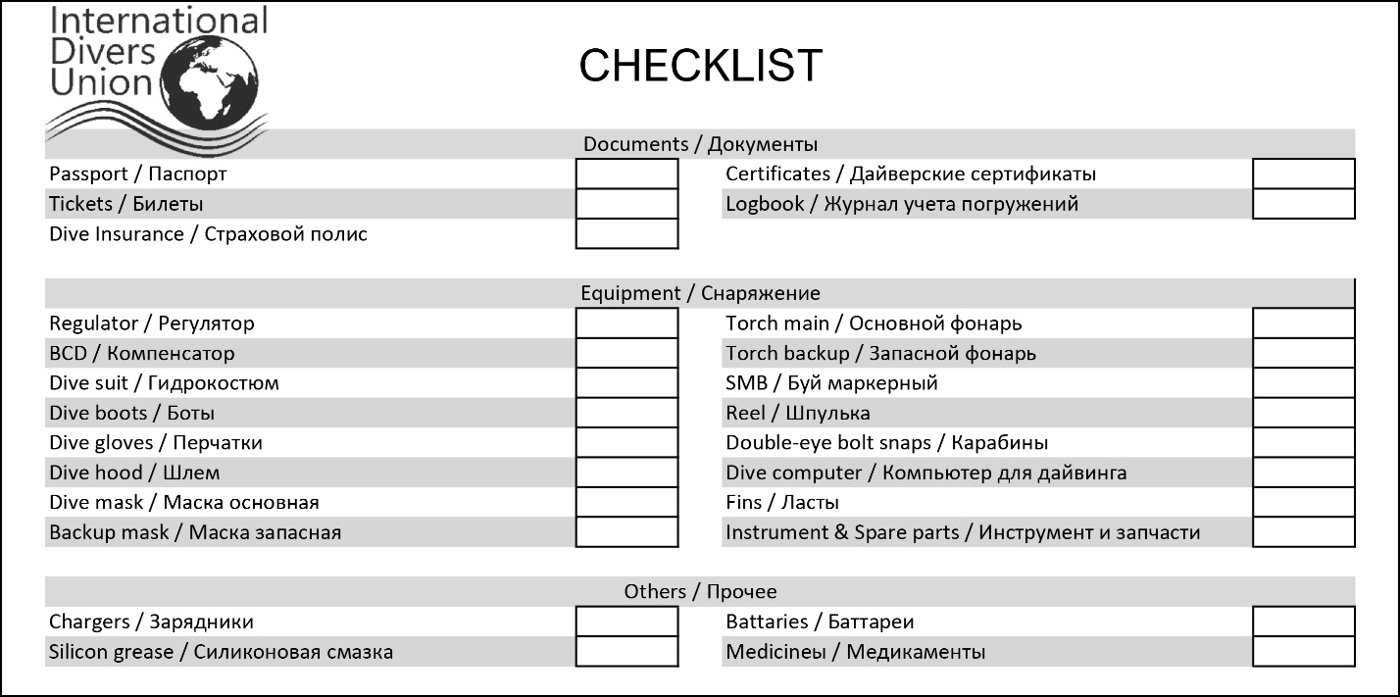
Use a packing checklist and bring your certification card, logbook and insurance policy.
Travelling diver's first aid kit:
- oral rehydration salts;
- ear drops (only as prescribed by a doctor);
- seasickness medication (without marked sedative effect — test your tolerance in advance, not before your first dive);
- painkiller and anti-inflammatory;
- antihistamine tablets and cream — for stings;
- household vinegar — for jellyfish stings (Chapter 8);
- antiseptic, plasters, bandage, sterile wipes;
- sunscreen.
Repair kit: spare mouthpiece, O-ring kit and O-ring pick, cable ties, a multi-purpose dive tool (hex keys, valve and inflator keys, screwdriver), adjustable spanner, spare mask and fin straps.
Flying after diving. Observe the time to fly shown by your computer (Chapter 7); don't plan dives on the day of departure.
12.4 Logbook
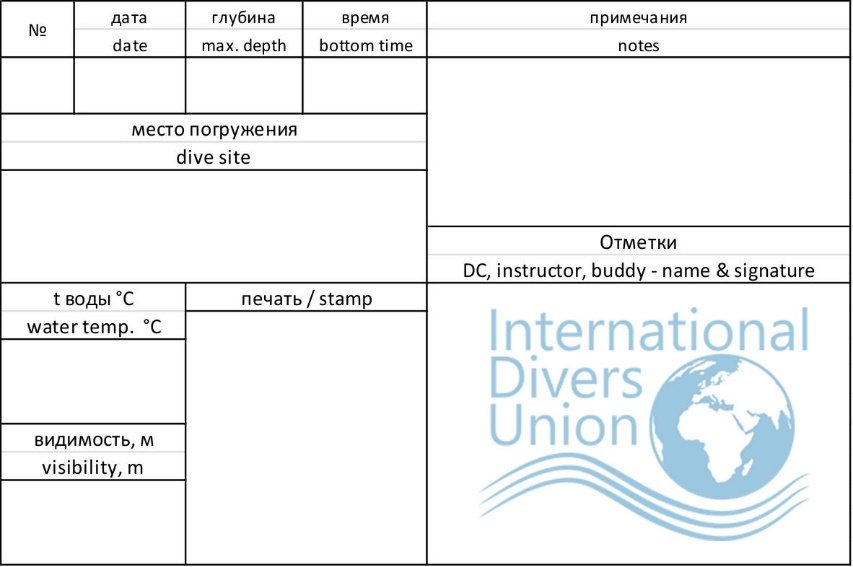
A logbook records your dives and experience. A dive centre uses it to assess your training and choose suitable dives, and an instructor uses it to decide whether you can join the next course.
Record: date, site, depth and time, gas and start/end pressure, weights and suit, conditions (temperature, visibility, current), buddy, observations. Your logbook will remind you how much weight you used with that suit and which sites you liked. A computer's electronic log is convenient but does not replace notes on weights, equipment and conditions.
12.5 Further IDU training

The Open Water Diver IDU course gives you basic knowledge and skills. The underwater world is diverse, and many conditions require special training.
Recreational programmes:
- Advanced Adventure Open Water Diver IDU — an introduction to specialties: Perfect Buoyancy Control, Deep, Underwater Navigation and one of your choice; depth up to 30 m.
- Advanced Open Water Diver IDU — five full specialty courses: Perfect Buoyancy Control, Deep Diver, Underwater Navigation, Nitrox Diver and one of your choice (Dry Suit, Night and Low Visibility, Wreck, Drift, Ice, Sidemount or TECH Fundamental); depth up to 40 m.
- Emergency First Aid IDU — first aid and CPR, also for non-divers.
- Rescue Diver IDU — preventing and handling emergencies, rescue in the water and on shore.
Specialties: Nitrox Diver (recommended together with OWD), Dry Suit Diver, Ice Diver, Night Dive and Low Visibility, Underwater Navigation, Perfect Buoyancy Control, Boat Diver, Drift Dive, Deep Diver, Sidemount Diver, Recreational Wreck Diver, DPV Diver, Self-Reliant Diver, Gas Blender, Trimix Gas Blender.
Technical diving: TECH Fundamental → TECH-1 / TECH-1 Trimix → TECH-2 → TECH-3; rebreathers — TECH CCR-1, CCR-2, CCR-3.
Cave diving: Cavern → CAVE-1 → CAVE-2 → TECH CAVE.
Professional programmes: Divemaster IDU — the first professional level (guide, instructor's assistant), followed by IDU instructor courses.
Knowledge check
8 questions
Final exam Open Water Diver IDU
An exam on all chapters of the manual: 60 self-checked questions, including IDU table problems. The result is sent to your instructor. The exam is optional — you can skip it.
The exam opens in a new window. If it does not open, allow pop-ups for this site.